In this guide, we will build a cuisine recommendation web application that runs a machine learning model directly in the browser. Instead of using a backend server, we will leverage ONNX Web to let users interact with the model through a simple frontend interface.
Cuisine Recommendation Web Application
This project focuses on the machine learning pipeline rather than front end development. Our objective is to package a trained model so that end users can interact with it directly in the browser, without relying on backend API calls.
In previous regression tutorials, we used pickle to save models and Flask to serve them. Now we will explore ONNX Web, which broadens the possibilities for deploying machine learning models in client-side applications.
ONNX Web
ONNX Web is a toolkit and libray for running ONNX models in the browser, primarily used for inference with deep learning models. ONNX (Open Neural Network Exchange) is an open format that enables model sharing across different deep learning frameworks. With ONNX Web, developers can execute ONNX models directly in web pages, which is useful for frontend machine learning and deep learning scenarios.
Development Steps
- Prepare an ONNX model: First, you need a trained model that has been exported to the ONNX format.
- Include the ONNX Web library: Add the JavaScript library to your frontend project, either via npm or a CDN.
<script src="https://cdn.jsdelivr.net/npm/onnxruntime-web@1.9.09/dist/ort.min.js"></script>
- Load the model: Use the ONNX Web API to load the model and prepare for inference.
const session = await ort.InferenceSession.create('./model.onnx');
- Run inference: Prepare input data and invoke the loaded model.
- Process output: Handle the model's output format, display results, or integrate them into the application.
Let's build a complete web application step by step.
Building the Model
We will train a classification model using the cleaned cuisines dataset from a previous lesson.
import pandas as pd
from sklearn.model_selection import train_test_split
from sklearn.svm import SVC
from sklearn.metrics import classification_report

cuisine_data = pd.read_csv('../data/cleaned_cuisines.csv')
features = cuisine_data.iloc[:, 2:]
targets = cuisine_data[['cuisine']]
X_train, X_test, y_train, y_test = train_test_split(features, targets, test_size=0.3)

classifier = SVC(kernel='linear', C=10, probability=True, random_state=0)
classifier.fit(X_train, y_train.values.ravel())
predictions = classifier.predict(X_test)
print(classification_report(y_test, predictions))
The code follows a standard supervised learning workflow. The resulting model performs well, as shown in the classification report:
              precision    recall  f1-score   support

     chinese       0.71      0.72      0.72       238
      indian       0.90      0.86      0.88       259
    japanese       0.76      0.75      0.75       248
      korean       0.83      0.78      0.80       233
        thai       0.73      0.82      0.77       221

    accuracy                           0.79      1199
   macro avg       0.79      0.79      0.78      1199
weighted avg       0.79      0.79      0.79      1199
Converting the Model to ONNX
Install the required package:
pip install skl2onnx
Then convert the Scikit-learn model:
from skl2onnx import convert_sklearn
from skl2onnx.common.data_types import FloatTensorType

input_description = [('float_input', FloatTensorType([None, 380]))]
conversion_options = {id(classifier): {'nocl': True, 'zipmap': False}}
onnx_model = convert_sklearn(classifier, initial_types=input_description, options=conversion_options)
with open("./model.onnx", "wb") as f:
    f.write(onnx_model.SerializeToString())
This snippet defines the input structure and conversion settings:
input_descriptionspecifies that the model expects a tensor named'float_input'with shape[None, 380], whereNonerepresents a variable batch size and 380 is the number of features.conversion_optionsturns off class label mapping (nocl: True) and disables the ZipMap output format, keeping the output as a multidimensional array instead of a dictionary.
Finally, the ONNX model is written to disk.
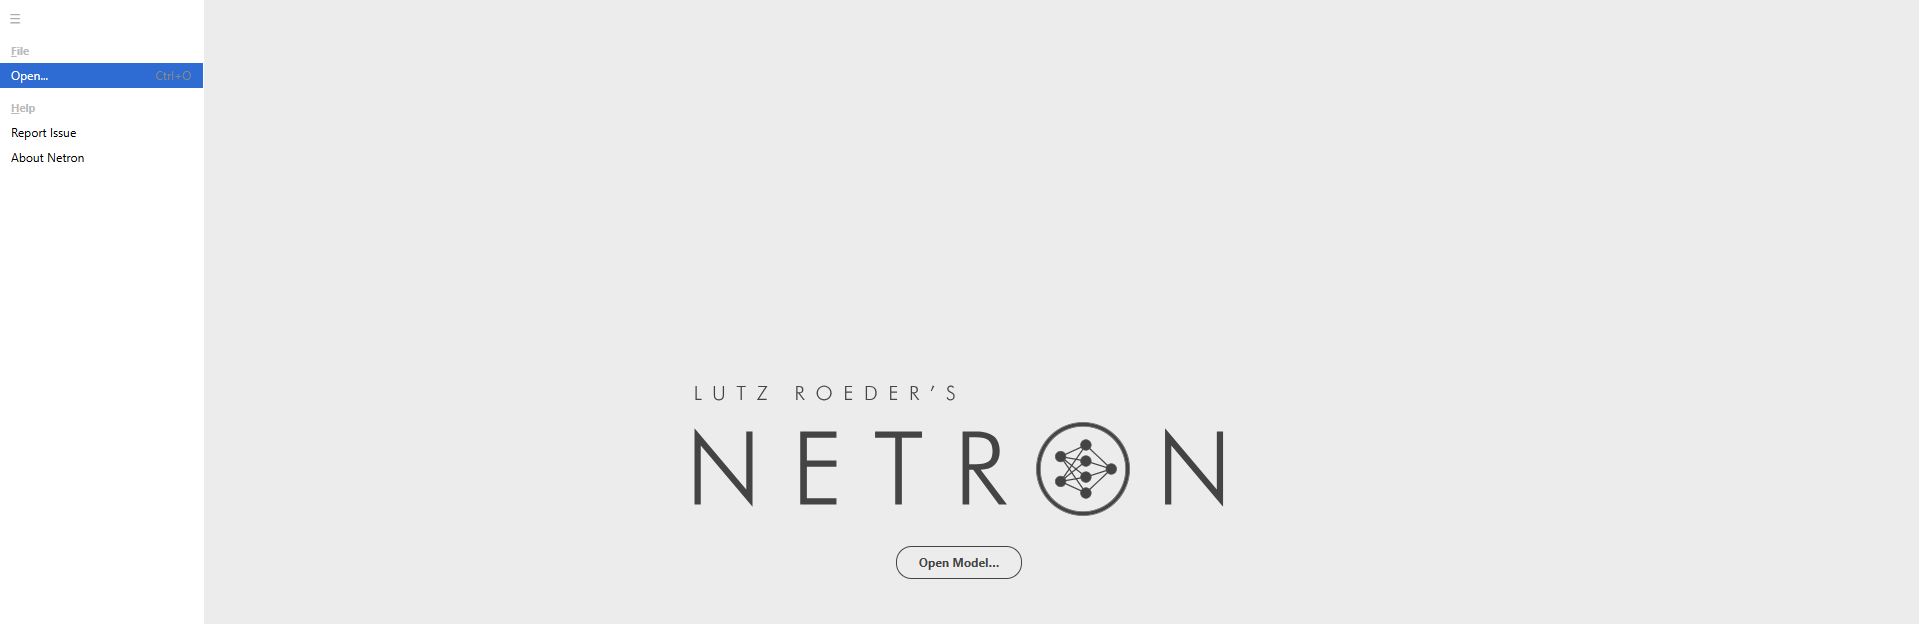
Visualizing the Model with Netron
Netron is an open-source tool for visualizing and analyzing deep learning models. It supports ONNX, TensorFlow, Keras, PyTorch, and many other formats, providing an intuitive graphical interface to examine the model's structure, layers, and parameters.
GitHub repository: https://github.com/lutzroeder/Netron?tab=readme-ov-file Online viewer: https://netron.app/
After uploading the converted model, you can inspect its architecture in detail.
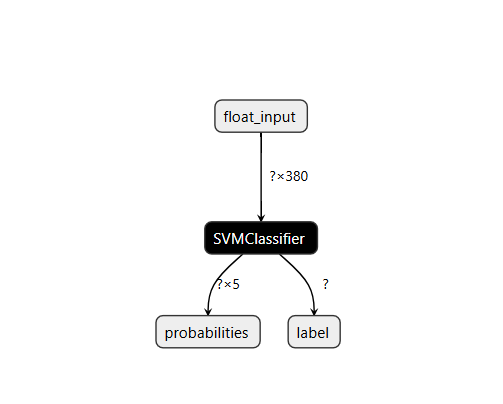
Clicking on a component, such as "SVMClassifier", reveals more information.
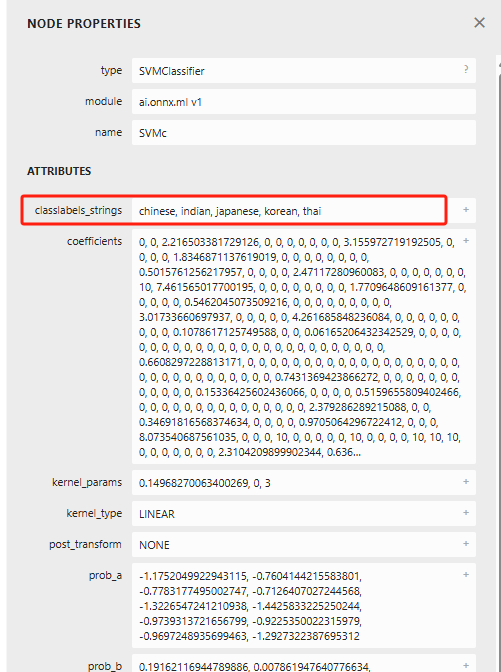
Netron is a useful companion for understanding and debugging models before deployment.
Web Application
This time we will build a completely static frontend without a Python backend.
<!DOCTYPE html>
<html>
  <header>
    <title>Cuisine Matcher</title>
  </header>
  <body>
    <h1>Check your refrigerator. What can you create?</h1>
    <div id="wrapper">
      <div class="boxCont">
        <input type="checkbox" value="4" class="checkbox">
        <label>apple</label>
      </div>

      <div class="boxCont">
        <input type="checkbox" value="247" class="checkbox">
        <label>pear</label>
      </div>

      <div class="boxCont">
        <input type="checkbox" value="77" class="checkbox">
        <label>cherry</label>
      </div>

      <div class="boxCont">
        <input type="checkbox" value="126" class="checkbox">
        <label>fenugreek</label>
      </div>

      <div class="boxCont">
        <input type="checkbox" value="302" class="checkbox">
        <label>sake</label>
      </div>

      <div class="boxCont">
        <input type="checkbox" value="327" class="checkbox">
        <label>soy sauce</label>
      </div>

      <div class="boxCont">
        <input type="checkbox" value="112" class="checkbox">
        <label>cumin</label>
      </div>
    </div>
    <div style="padding-top:10px">
      <button onClick="startInference()">Which cuisine can you make?</button>
    </div>

    <!-- import ONNX Runtime Web from CDN -->
    <script src="https://cdn.jsdelivr.net/npm/onnxruntime-web@1.9.0/dist/ort.min.js"></script>
    <script>
    const selectedItems = Array(380).fill(0);

    const checkboxes = [...document.querySelectorAll('.checkbox')];

    checkboxes.forEach(box => {
        box.addEventListener('change', function() {
            selectedItems[box.value] = box.checked ? 1 : 0;
        });
    });

    function isAnyChecked() {
        return checkboxes.some(box => box.checked);
    }

    async function startInference() {
        let anyChecked = isAnyChecked();
        if (!anyChecked) {
            alert('Please select at least one ingredient.');
            return;
        }
        try {
            const session = await ort.InferenceSession.create('./model.onnx');

            const inputTensor = new ort.Tensor(new Float32Array(selectedItems), [1, 380]);
            const feeds = { float_input: inputTensor };

            const output = await session.run(feeds);

            alert('You can enjoy ' + output.label.data[0] + ' cuisine today!');
        } catch (e) {
            console.log(`Failed to run ONNX model inference`);
            console.error(e);
        }
    }
    </script>
  </body>
</html>
Explanation of the JavaScript logic:
- An array
selectedItemsof length 380 is initialized with zeros, representing ingredient selection state. - All checkboxes are collected, and a change event listener is attached to each. When the checkbox state changes, the corresponding position in
selectedItemsis updated to 1 (checked) or 0 (unchecked). isAnyCheckedverifies whether at least one checkbox has been selected.startInferencefirst validates that the user has chosen at least one ingredient; otherwise, an alert is shown.- If valid, the ONNX model (
model.onnx) is loaded asynchronously. - An input tensor with shape
[1, 380]is created fromselectedItems. - The model's
runmethod is called with the prepared feeds, and the prediction result is read. The recommended cuisine is displayed in an alert.
- If valid, the ONNX model (
To serve the static files, install a simple HTTP server:
npm install --global http-server
Launch it and navigate to the page. You will see:
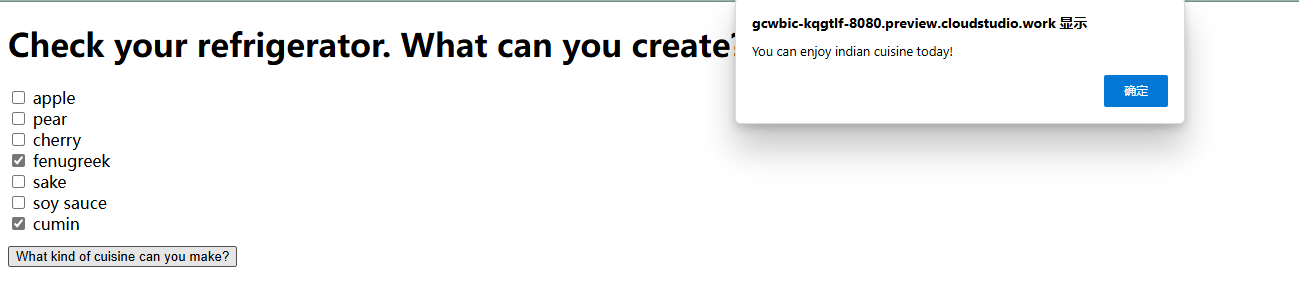
We have now finished building the entire web application.
Summary
In this learning journey, we built a cuisine recommendation web app and explored the intersection of machine learning and web development. Using ONNX Web, we integrated a trained model directly into the browser, enabling users to interact with it without any backend, which greatly enhances the user experience. Together with Netron, a powerful visualization tool, we not only analyzed the model's internal structure but also intuitively demonstrated its performance.
This marks the end of our classification chapters. In the next session, we will dive into clustering techniques and understand their important applications in data analysis and machine learning.