This guide serves as a walkthrough for building a simple microservices architecture using .NET Core. It's recommended to read this on a desktop for better formatting.
Note: Microservices are not a silver bullet. This content is for reference and discussion only. For most small projects, avoid using microservices just for the sake of it. Technology serves the business, not the other way around.
Table of Contents
- Overview
- Benefits of Microservices
- Drawbacks of Microservices (when service discovery is needed)
- Traditional Architecture
- Ocelot (API Gateway) Architecture
- Integrating IdentityService (Authentication)
- Integrating Consul (Service Discovery)
- Building a Simple Microservices Architecture based on Ocelot
- Ocelot
- Basic Integration
- Adding Ocelot
- Adding Test API Projects
- Configuring Upstream Requests (ocelot.json)
- Running the Result
- Aggregated API Documentation (Swagger UI)
- ConfigureServices
- Configure
- appsettings.json
- Configuring Swagger Upstream Requests (ocelot.json)
- Running the Result
- IdentityServer Integration
- Adding the Authorization Service Project
- Configuring appsettings.json
- Adding the IdentityServerConfig Class
- Defining API Resources
- Defining Identity Resources
- Defining Test Clients
- Configuring Startup
- ConfigureServices
- Configure
- Running the Result
- Configuring the ApiGateway Project
- Calling Ocelot Management API
- API Methods
- Consul (Service Discovery)
- Local Deployment
- Installation
- Adding Service Configuration
- Adding Health Check Configuration
- Docker Deployment (Tencent Cloud)
- Configuring Ocelot Gateway
- Integrating Message Queue – CAP
- Introduction
- Environment Setup
- Integrating CAP with .NET Core
- CAP Publishing
- CAP Subscribing (Receiving)
- Ocelot
- Final – Complete Source Code
Overview
As business requirements evolve rapidly, there's a growing need for faster and more efficient software delivery. Microservices address the limitations of monolithic applications by decomposing them into smaller, independently deployable services. Each service focuses on a specific business module and can be distributed across multiple servers. This article demonstrates how to build a custom microservices architecture using .NET Core.
Benefits of Microservices
- Easy to develop, understand, and maintain individual services.
- Dedicated teams can work on separate services.
- Independent deployment of each service.
- Inndependent scaling of services.
Drawbacks of Microservices (When Service Discovery is Needed)
- Distributed systems introduce inherent complexity.
- Challenges include service address management, health monitoring, deployment complexity, service dependencies, and database partitioning.
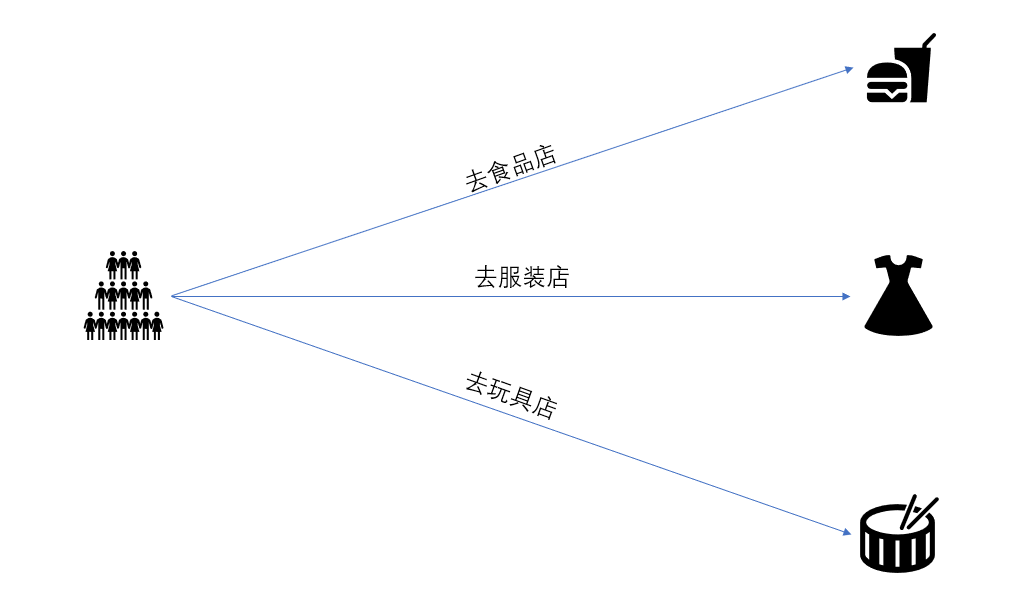
Traditional Architecture
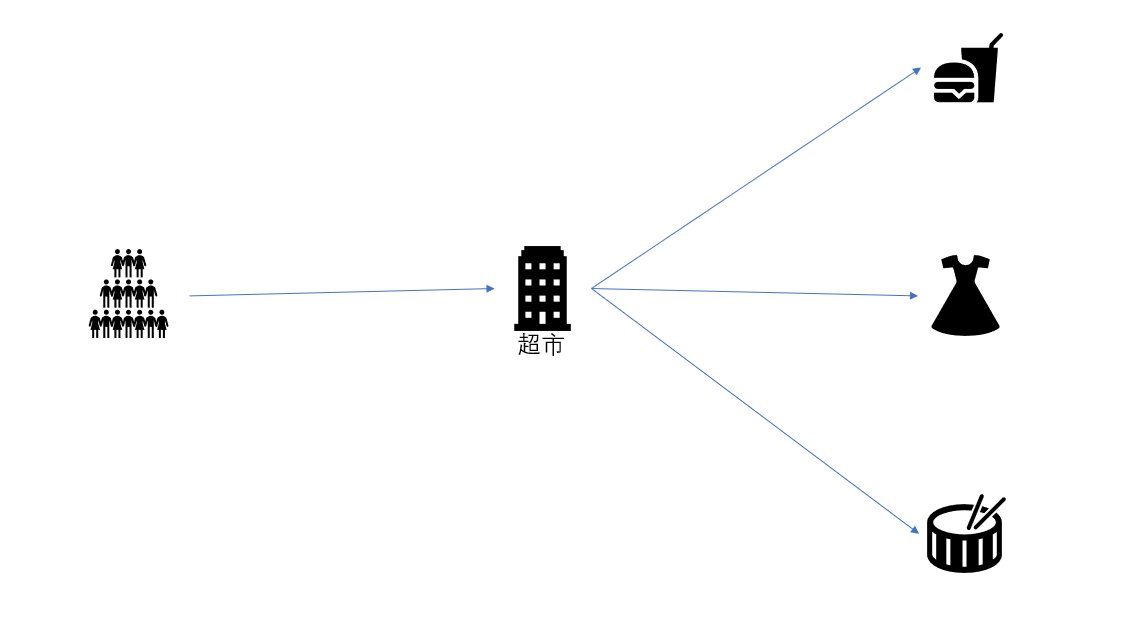
Ocelot (API Gateway) Architecture
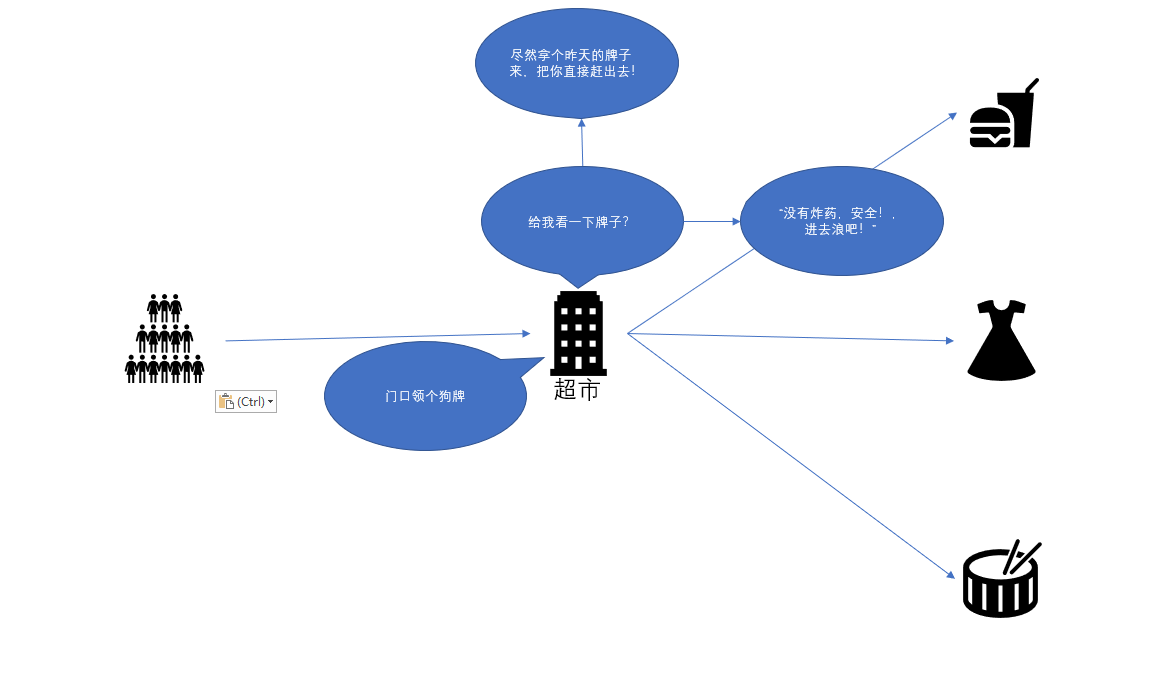
Integrating IdentityService (Authentication)
Integrating Consul (Service Discovery)
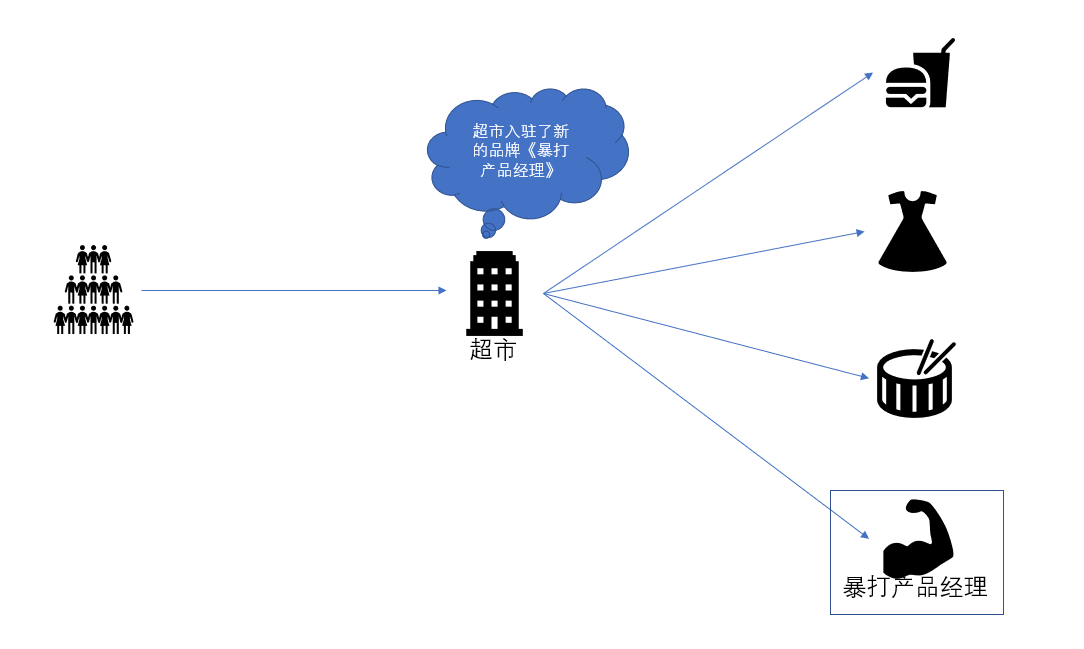
Building a Simple Microservices Architecture Based on Ocelot
Ocelot
Ocelot is an API Gateway for .NET Core. It's easy to use but configuration can be complex. Its features include routing, request aggregation, service discovery, authentication, authorization, rate limiting, circuit breaking, and built-in load balancing – all configurable.
- Open Source: https://github.com/ThreeMammals/Ocelot
- Documentation: https://ocelot.readthedocs.io/en/latest/index.html
Basic Integration
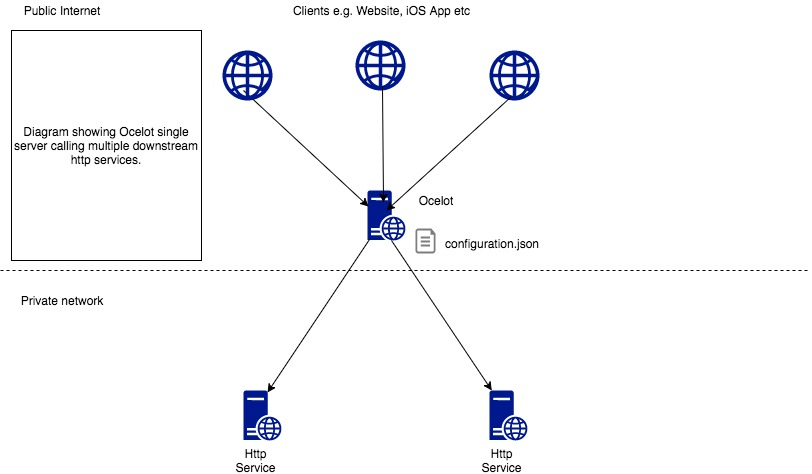
Adding Ocelot
Create a new .NET Core 2.2 Web project (named ApiGateway) and add the following NuGet packages:
- Ocelot
- Ocelot.Administration – allows runtime configuration changes via an authenticated HTTP API.
- Ocelot.Cache.CacheManager – CacheManager extension.
- Ocelot.Provider.Polly – Polly extension for resilience.
Add an ocelot.json file to the project root (name can be customized).
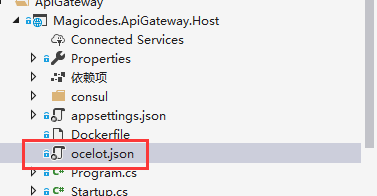
Configuration has two main sections: ReRoutes and GlobalConfiguration. ReRoutes define how upstream requests are handled. GlobalConfiguration contains global settings. Below is a basic configuration:
{
  "GlobalConfiguration": {
    "BaseUrl": "http://localhost:13000",
    "RateLimitOptions": {
      "ClientWhitelist": [],
      "EnableRateLimiting": true,
      "Period": "1s",
      "PeriodTimespan": 1,
      "Limit": 1,
      "QuotaExceededMessage": "Request limit exceeded within time period!",
      "HttpStatusCode": 999
    },
    "QoSOptions": {
      "ExceptionsAllowedBeforeBreaking": 3,
      "DurationOfBreak": 5,
      "TimeoutValue": 5000
    }
  },
  "ReRoutes": []
}
After initializing the config file, load it in Program.cs. Ocelot supports environment-specific configuration files.
public class Program
{
    public static void Main(string[] args)
    {
        CreateWebHostBuilder(args).Build().Run();
    }

    public static IWebHostBuilder CreateWebHostBuilder(string[] args) =>
        new WebHostBuilder()
            .UseKestrel((context, opt) =>
            {
                opt.AddServerHeader = false;
            })
            .UseContentRoot(Directory.GetCurrentDirectory())
            .ConfigureAppConfiguration((hostingContext, config) =>
            {
                var env = hostingContext.HostingEnvironment;
                config.AddJsonFile("appsettings.json", optional: true, reloadOnChange: true)
                      .AddJsonFile($"appsettings.{env.EnvironmentName}.json", optional: true, reloadOnChange: true)
                      .AddJsonFile("ocelot.json")
                      .AddEnvironmentVariables();
            })
            .UseIISIntegration()
            .ConfigureLogging((hostingContext, logging) =>
            {
                logging.AddConfiguration(hostingContext.Configuration.GetSection("Logging"));
                logging.AddConsole();
                logging.AddDebug();
            })
            .UseStartup<Startup>();
}
In Startup.cs, register Ocelot in ConfigureServices using AddOcelot() and use app.UseOcelot().Wait(); in Configure.
services.AddOcelot(Configuration);
app.UseOcelot().Wait();
Adding Test API Projects
Create two .NET Core 2.2 Web API projects (default template) and add Swagger for API documentation.
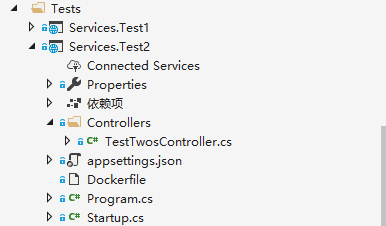
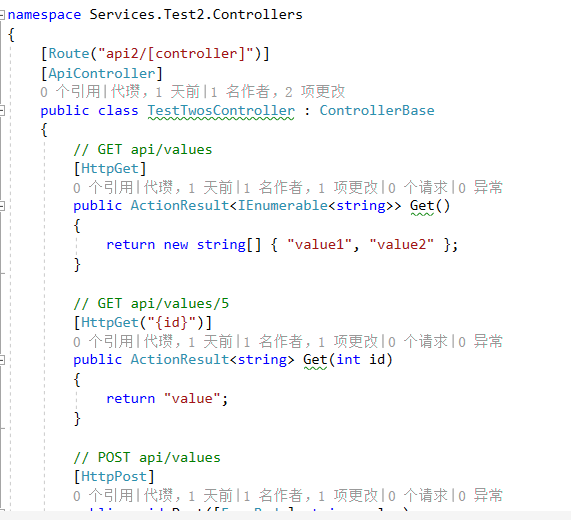
Add NuGet packages: Swashbuckle.AspNetCore and Microsoft.Extensions.PlatformAbstractions.
public void ConfigureServices(IServiceCollection services)
{
    services.AddMvc().SetCompatibilityVersion(CompatibilityVersion.Version_2_2);
    services.AddSwaggerGen(options =>
    {
        options.SwaggerDoc("SwaggerAPI1", new Info { Title = "API1", Version = "v1" });
        var basePath = PlatformServices.Default.Application.ApplicationBasePath;
        var xmlPath = Path.Combine(basePath, "Services.Test1.xml");
        options.IncludeXmlComments(xmlPath);
    });
}

public void Configure(IApplicationBuilder app, IHostingEnvironment env)
{
    if (env.IsDevelopment())
    {
        app.UseDeveloperExceptionPage();
    }
    app.UseSwagger(c => { c.RouteTemplate = "{documentName}/swagger.json"; });
    app.UseSwaggerUI(c =>
    {
        c.SwaggerEndpoint("/SwaggerAPI1/swagger.json", "API1");
    });
    app.UseMvc();
}
Configure XML documentation output in the .csproj file.
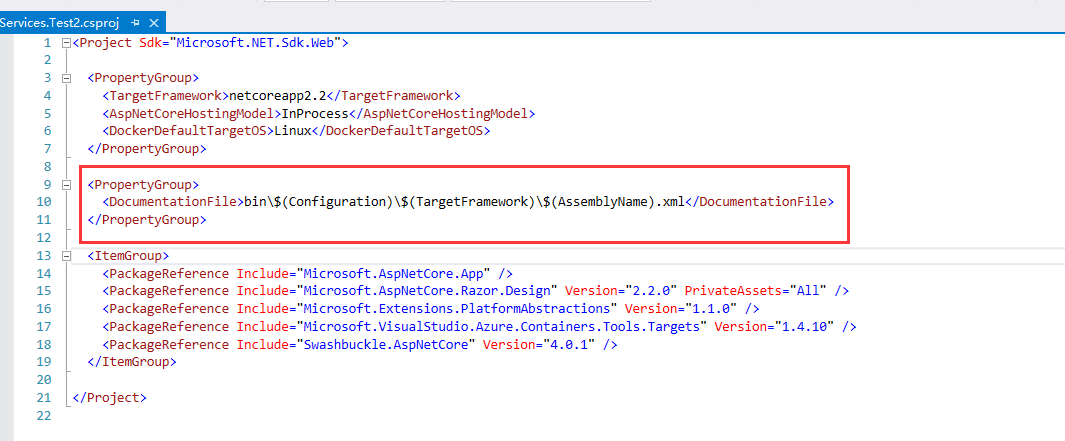
The configuration for Services.Test1 and Services.Test2 is similar.
Configuring Upstream Requests (ocelot.json)
"ReRoutes": [
  {
    "UpstreamPathTemplate": "/gateway/1/{url}",
    "UpstreamHttpMethod": [ "Get", "Post", "Delete", "Put" ],
    "DownstreamPathTemplate": "/api1/{url}",
    "DownstreamScheme": "http",
    "ServiceName": "API1",
    "UseServiceDiscovery": true,
    "LoadBalancer": "RoundRobin",
    "DownstreamHostAndPorts": [
      { "Host": "119.29.50.115", "Port": 80 },
      { "Host": "localhost", "Port": 13001 }
    ],
    "QoSOptions": {
      "ExceptionsAllowedBeforeBreaking": 3,
      "DurationOfBreak": 10,
      "TimeoutValue": 5000
    }
  },
  {
    "UpstreamPathTemplate": "/gateway/2/{url}",
    "UpstreamHttpMethod": [ "Get", "Post", "Delete", "Put" ],
    "DownstreamPathTemplate": "/api2/{url}",
    "DownstreamScheme": "http",
    "ServiceName": "API2",
    "UseServiceDiscovery": true,
    "LoadBalancer": "RoundRobin",
    "DownstreamHostAndPorts": [
      { "Host": "111.230.160.62", "Port": 80 },
      { "Host": "localhost", "Port": 13002 }
    ],
    "QoSOptions": {
      "ExceptionsAllowedBeforeBreaking": 3,
      "DurationOfBreak": 10,
      "TimeoutValue": 5000
    }
  }
]
Route Configuration Properties:
| Property | Description |
|---|---|
UpstreamPathTemplate |
Upstream path pattern |
UpstreamHttpMethod |
Allowed HTTP methods for upstream |
DownstreamPathTemplate |
Downstream path pattern |
DownstreamScheme |
Downstream protocol (http/https) |
DownstreamHostAndPorts |
Downstream host and port, multiple allowed |
UseServiceDiscovery |
Enable service discovery (true/false) |
ServiceName |
Service name for discovery |
LoadBalancer |
Load balancing algorithm: RoundRobin, LeastConnection, NoLoadBalancer |
LoadBalancerOptions |
Load balancer configuration |
QoSOptions |
Circuit breaker settings |
AuthenticationOptions |
Authentication settings |
Running the Result
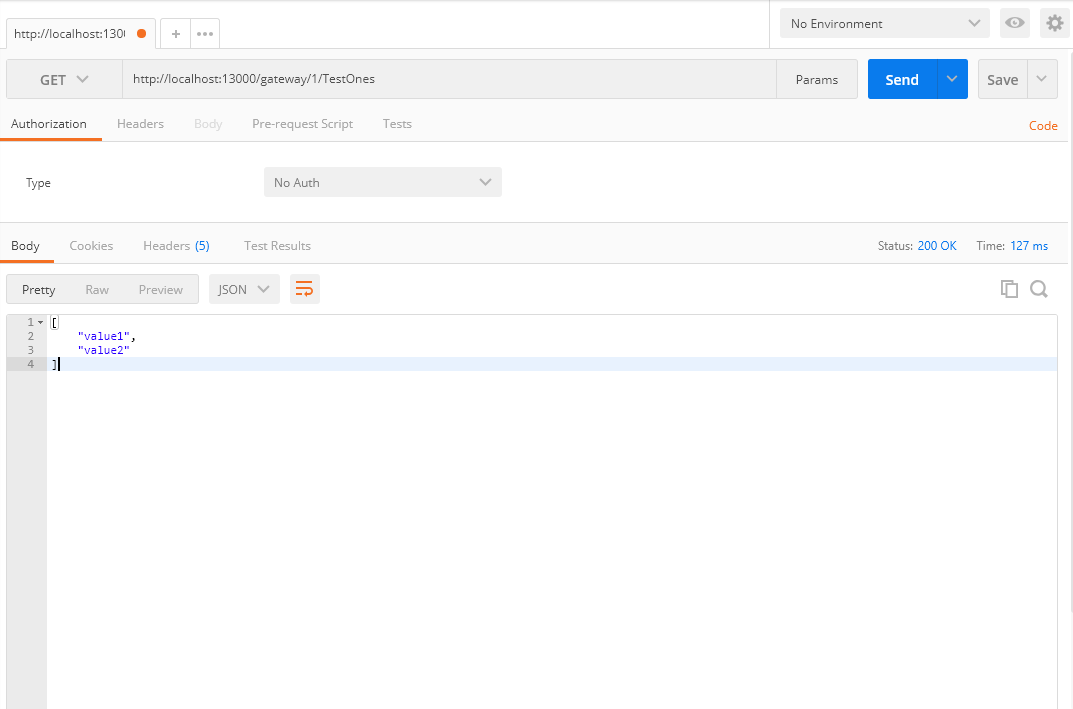
Start the web project. The Swagger page may error, but using Postman to hit the gateway endpoint for api1/TestOnes succeeds.
Aggregated API Documentation (Swagger UI)
Configure Swagger in the ApiGateway project to aggregate the downstream services' Swagger documents.
ConfigureServices
services.AddSwaggerGen(options =>
{
    options.SwaggerDoc(Configuration["Swagger:Name"], new Info { Title = Configuration["Swagger:Title"], Version = Configuration["Swagger:Version"] });
});
Configure
public void Configure(IApplicationBuilder app, IHostingEnvironment env)
{
    var apis = Configuration["Apis:SwaggerNames"].Split(";").ToList();
    if (env.IsDevelopment())
        app.UseDeveloperExceptionPage();

    app.UseMvc()
       .UseSwagger()
       .UseSwaggerUI(options =>
       {
           apis.ForEach(key =>
           {
               options.SwaggerEndpoint($"/{key}/swagger.json", key);
           });
           options.DocumentTitle = "Gateway";
       });
    app.UseOcelot().Wait();
}
appsettings.json
{
  "Swagger": {
    "Name": "ApiGateway",
    "Title": "Gateway Service",
    "Version": "v1"
  },
  "Apis": {
    "SwaggerNames": "SwaggerAPI1;SwaggerAPI2"
  }
}
Note:
SwaggerAPI1andSwaggerAPI2correspond to theSwaggerDocnames used in the downstream services.
Configuring Swagger Upstream Requests (ocelot.json)
{
  "DownstreamPathTemplate": "/SwaggerAPI1/swagger.json",
  "DownstreamScheme": "http",
  "UpstreamPathTemplate": "/SwaggerAPI1/swagger.json",
  "UpstreamHttpMethod": [ "GET", "POST", "DELETE", "PUT" ],
  "DownstreamHostAndPorts": [
    { "Host": "119.29.50.115", "Port": 80 },
    { "Host": "localhost", "Port": 13001 }
  ]
},
{
  "DownstreamPathTemplate": "/SwaggerAPI2/swagger.json",
  "DownstreamScheme": "http",
  "UpstreamPathTemplate": "/SwaggerAPI2/swagger.json",
  "UpstreamHttpMethod": [ "GET", "POST", "DELETE", "PUT" ],
  "DownstreamHostAndPorts": [
    { "Host": "111.230.160.62", "Port": 80 },
    { "Host": "localhost", "Port": 13002 }
  ]
}
Running the Result
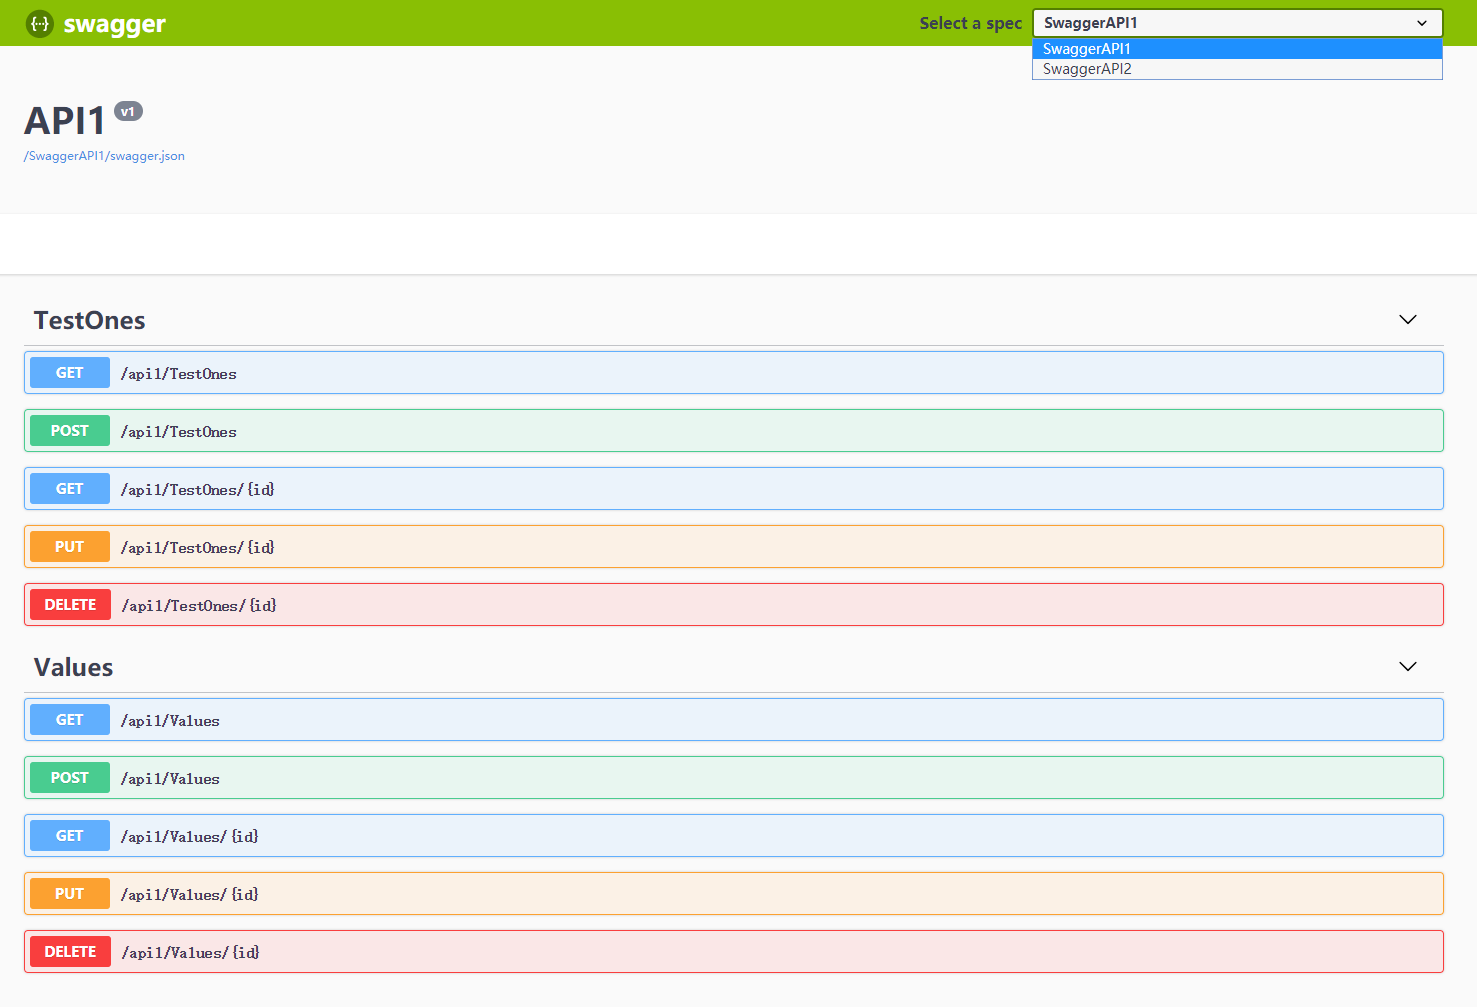
Swagger UI now aggregates API1 and API2 documentation.
IdentityServer Integration
IdentityServer4 is a framework for adding OpenID Connect and OAuth 2.0 endpoints to ASP.NET Core applications.
Documentation: http://docs.identityserver.io/en/latest/index.html
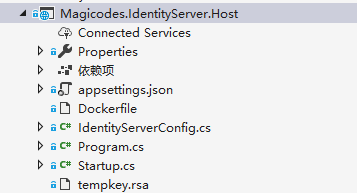
Adding the Authorization Service Project
Create a new .NET Core 2.2 Web project and add NuGet packages:
- IdentityServer4.AspNetIdentity
- IdentityServer4.EntityFramework
Configuring appsettings.json
Define client information and API resource scopes for testing. This configuration aligns with the IdentityServerConfig class.
"IdentityServer": {
  "ApiName": "default-api",
  "ApiSecret": "secret",
  "Clients": [
    {
      "ClientId": "client",
      "AllowedGrantTypes": [ "password" ],
      "ClientSecrets": [ { "Value": "def2edf7-5d42-4edc-a84a-30136c340e13" } ],
      "AllowedScopes": [ "default-api" ]
    },
    {
      "ClientId": "demo",
      "ClientName": "MVC Client Demo",
      "AllowedGrantTypes": [ "hybrid", "client_credentials" ],
      "RequireConsent": "true",
      "ClientSecrets": [ { "Value": "def2edf7-5d42-4edc-a84a-30136c340e13" } ],
      "RedirectUris": [ "http://openidclientdemo.com:8001/signin-oidc" ],
      "PostLogoutRedirectUris": [ "http://openidclientdemo.com:8001/signout-callback-oidc" ],
      "AllowedScopes": [ "openid", "profile", "default-api" ],
      "AllowOfflineAccess": "true"
    }
  ]
}
Adding the IdentityServerConfig Class
Defining API Resources
public static IEnumerable<ApiResource> GetApiResources()
{
    return new List<ApiResource>
    {
        new ApiResource("default-api", "Default (all) API")
        {
            Description = "All functionality you have in the application",
            ApiSecrets = { new Secret("secret") }
        }
    };
}
Defining Identity Resources
public static IEnumerable<IdentityResource> GetIdentityResources()
{
    var customProfile = new IdentityResource(
        name: "custom.profile",
        displayName: "Custom profile",
        claimTypes: new[] { "name", "email", "status" });

    return new List<IdentityResource>
    {
        new IdentityResources.OpenId(),
        new IdentityResources.Profile(),
        customProfile
    };
}
Defining Test Clients
Read client configuration from appsettings.json.
public static IEnumerable<Client> GetClients(IConfiguration configuration)
{
    var clients = new List<Client>();
    foreach (var child in configuration.GetSection("IdentityServer:Clients").GetChildren())
    {
        clients.Add(new Client
        {
            ClientId = child["ClientId"],
            ClientName = child["ClientName"],
            AllowedGrantTypes = child.GetSection("AllowedGrantTypes").GetChildren().Select(c => c.Value).ToArray(),
            RequireConsent = bool.Parse(child["RequireConsent"] ?? "false"),
            AllowOfflineAccess = bool.Parse(child["AllowOfflineAccess"] ?? "false"),
            ClientSecrets = child.GetSection("ClientSecrets").GetChildren().Select(secret => new Secret(secret["Value"].Sha256())).ToArray(),
            AllowedScopes = child.GetSection("AllowedScopes").GetChildren().Select(c => c.Value).ToArray(),
            RedirectUris = child.GetSection("RedirectUris").GetChildren().Select(c => c.Value).ToArray(),
            PostLogoutRedirectUris = child.GetSection("PostLogoutRedirectUris").GetChildren().Select(c => c.Value).ToArray(),
        });
    }
    return clients;
}
Configuring Startup
ConfigureServices
This example uses in-memory configuration for testing. Database-backed alternatives are commented.
public void ConfigureServices(IServiceCollection services)
{
    services.AddIdentityServer()
            .AddDeveloperSigningCredential()
            .AddInMemoryPersistedGrants()
            .AddInMemoryIdentityResources(IdentityServerConfig.GetIdentityResources())
            .AddInMemoryApiResources(IdentityServerConfig.GetApiResources())
            .AddInMemoryClients(IdentityServerConfig.GetClients(Configuration));
}
Configure
public void Configure(IApplicationBuilder app, IHostingEnvironment env)
{
    if (env.IsDevelopment())
        app.UseDeveloperExceptionPage();
    app.UseIdentityServer();
}
Running the Result
Start the service. The browser shows a 404 (no UI), but you can access the discovery document:
http://localhost:13004/.well-known/openid-configuration
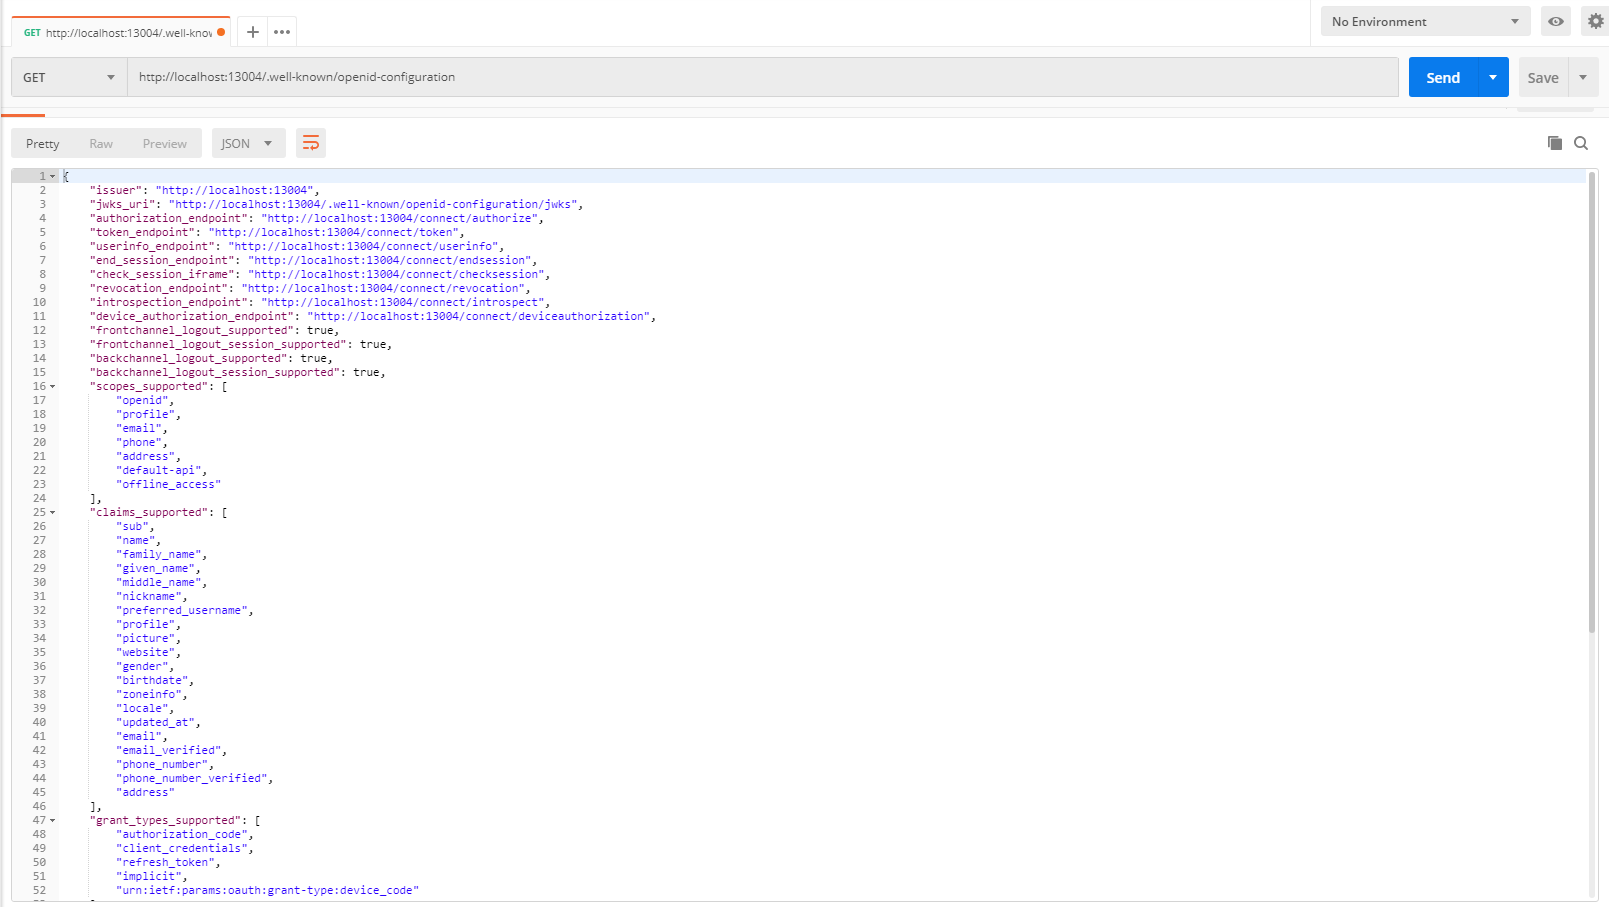
On first startup, IdentityServer creates a developer signing key file (tempkey.rsa).
Configuring the ApiGateway Project
Modify ocelot.json to enable authentication on routes:
"AuthenticationOptions": {
  "AuthenticationProviderKey": "IdentityBearer",
  "AllowedScopes": []
}
Add IdentityService configuration to appsettings.json:
"IdentityService": {
  "Uri": "http://localhost:13004",
  "DefaultScheme": "IdentityBearer",
  "UseHttps": false,
  "ApiName": "default-api",
  "ApiSecret": "def2edf7-5d42-4edc-a84a-30136c340e13"
}
Add NuGet package IdentityServer4.AccessTokenValidation to ApiGateway.
Update Startup.cs:
public void ConfigureServices(IServiceCollection services)
{
    Action<IdentityServerAuthenticationOptions> isaOpt = option =>
    {
        option.Authority = Configuration["IdentityService:Uri"];
        option.RequireHttpsMetadata = Convert.ToBoolean(Configuration["IdentityService:UseHttps"]);
        option.ApiName = Configuration["IdentityService:ApiName"];
        option.ApiSecret = Configuration["IdentityService:ApiSecret"];
        option.SupportedTokens = SupportedTokens.Both;
    };

    services.AddAuthentication()
            .AddIdentityServerAuthentication(Configuration["IdentityService:DefaultScheme"], isaOpt);

    services.AddOcelot(Configuration)
            .AddCacheManager(x => { x.WithDictionaryHandle(); })
            .AddPolly();

    services.AddMvc().SetCompatibilityVersion(CompatibilityVersion.Version_2_2);
    services.AddSwaggerGen(options =>
    {
        options.SwaggerDoc(Configuration["Swagger:Name"], new Info { Title = Configuration["Swagger:Title"], Version = Configuration["Swagger:Version"] });
    });
}
Now start all projects: Service.Test1, Service.Test2, ApiGateway, and IdentityService. Swagger UI will return 401 Unauthorized. Use Postman to get a token from IdentityService:
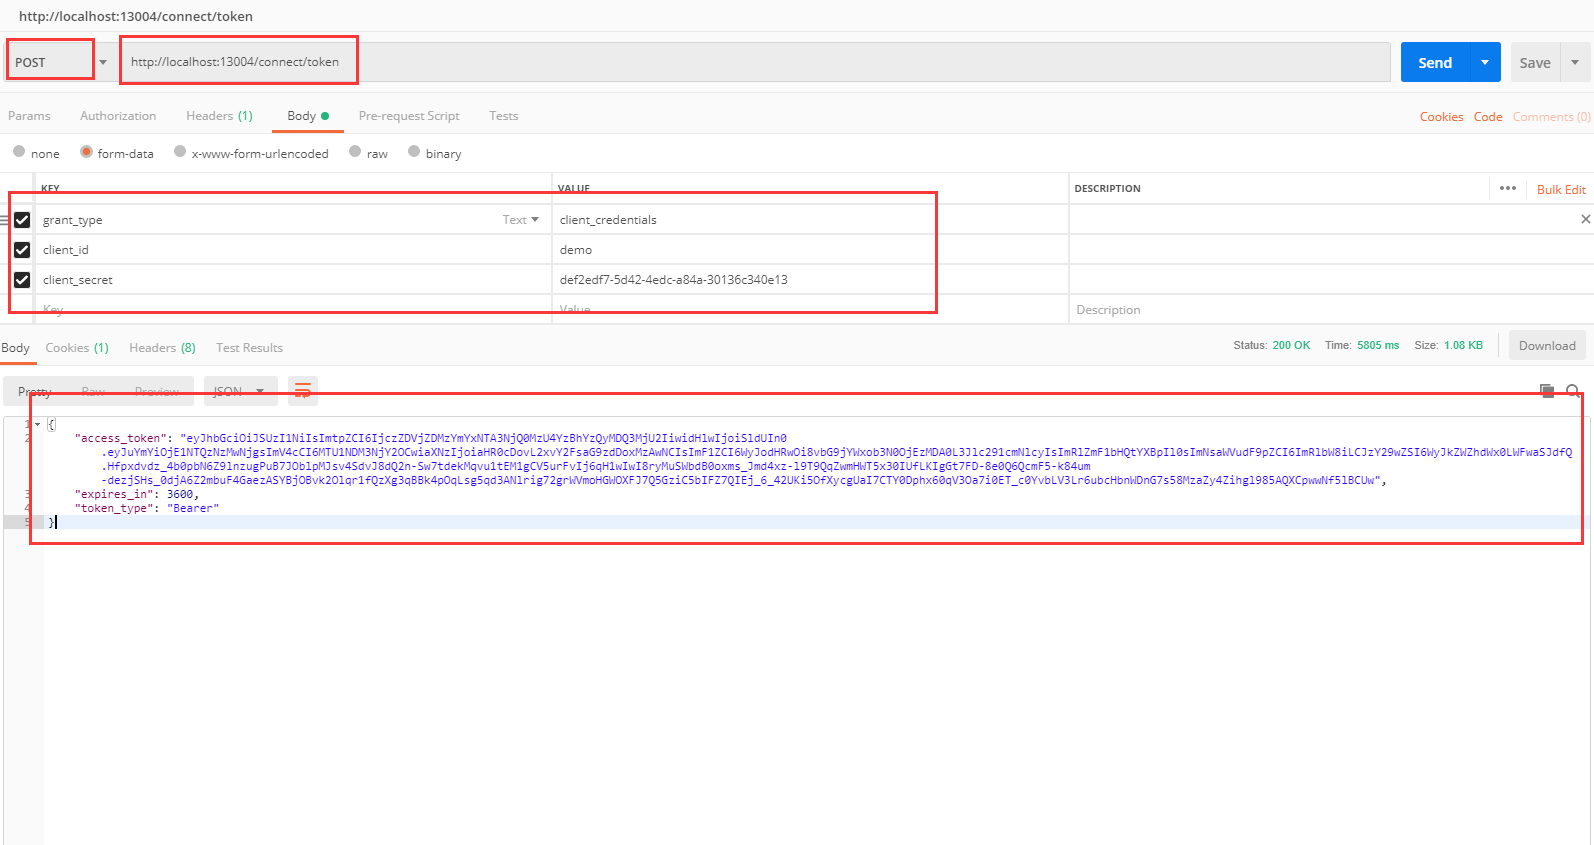
Use the token to access the API successfully:
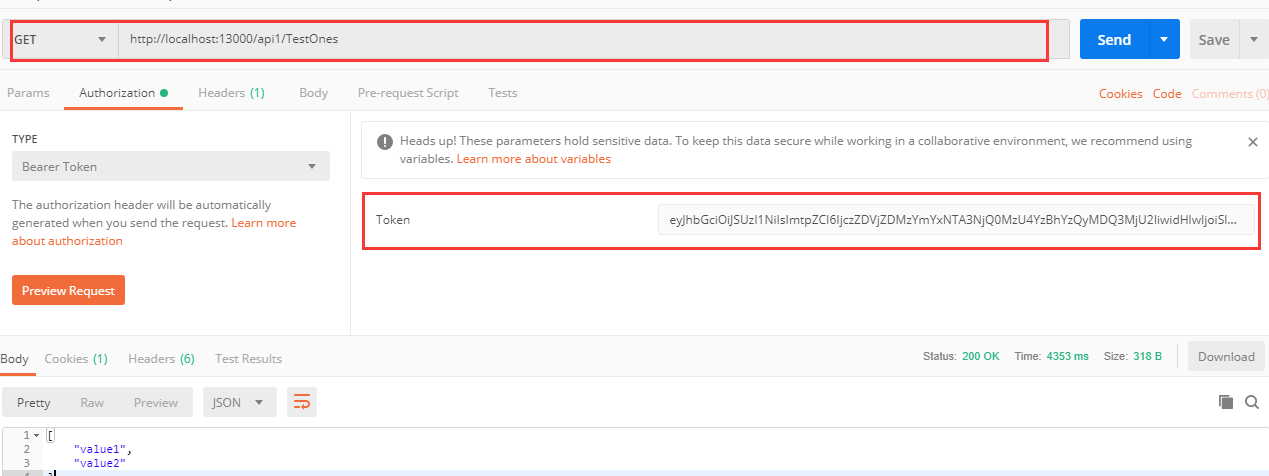
Calling Ocelot Management API
Add NuGet package Ocelot.Administration to ApiGateway. Then update Startup.cs:
services.AddOcelot(Configuration)
        .AddCacheManager(x => { x.WithDictionaryHandle(); })
        .AddPolly()
        .AddAdministration("/administration", isaOpt);
Available Management API Methods:
- POST {adminPath}/connect/token – Obtain a token (client credentials grant with
adminscope). - GET {adminPath}/configuration – Get current Ocelot configuraton.
- POST {adminPath}/configuration – Overwrite existing configuration (requires write permissions to
ocelot.json). - DELETE {adminPath}/outputcache/{region} – Clear cache region.
Consul (Service Discovery)
Consul provides service discovery, health checking, key-value storage, and multi-datacenter support.
Official site: https://www.consul.io/
Local Deployment
Download Consul from https://www.consul.io/downloads.html.
Installation
Unzip the package; it contains a single consul.exe file.

Run consul in a command prompt to verify installation.
Adding Service Configuration
Create a config folder (name can vary) in the same directory as consul.exe. Inside, create a service.json file for service registration.
{
  "services": [
    {
      "id": "API1",
      "name": "API1",
      "tags": [ "API1" ],
      "address": "172.0.0.1",
      "port": 80
    },
    {
      "id": "API2",
      "name": "API2",
      "tags": [ "API2" ],
      "address": "172.0.0.1",
      "port": 81
    }
  ]
}
Start Consul in development mode:
consul agent -dev -config-dir=./config
Access Consul UI at http://127.0.0.1:8500.
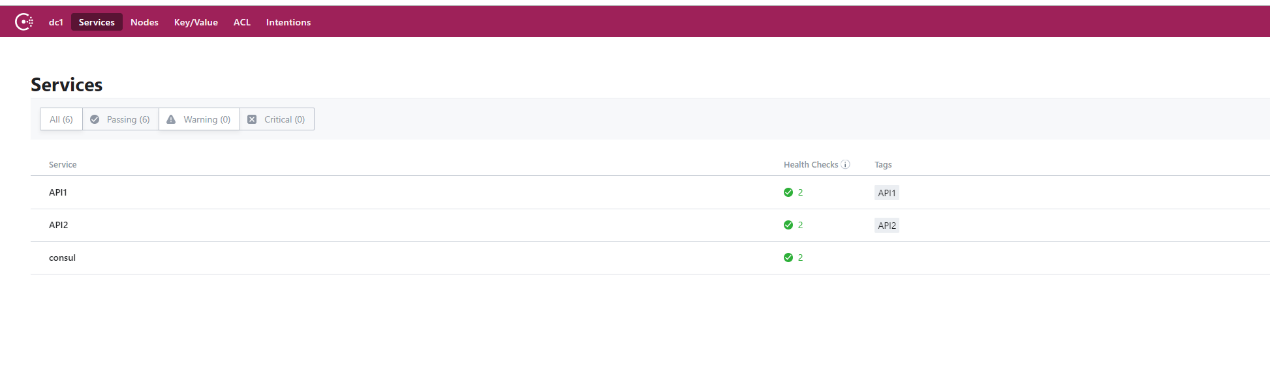
Adding Health Check Configuration
Health checks can be configured per service or globally. Add a TCP check for all services:
{
  "services": [ ... ],
  "check": {
    "id": "APICheck",
    "name": "APICheck",
    "tcp": "119.29.50.115:80",
    "interval": "10s",
    "timeout": "1s"
  }
}
Note: Defining check at the service level applies to that service; at the root level, it applies to all services.
Docker Deployment (Tencent Cloud)
Pull the Consul image from Docker Hub and create a service:
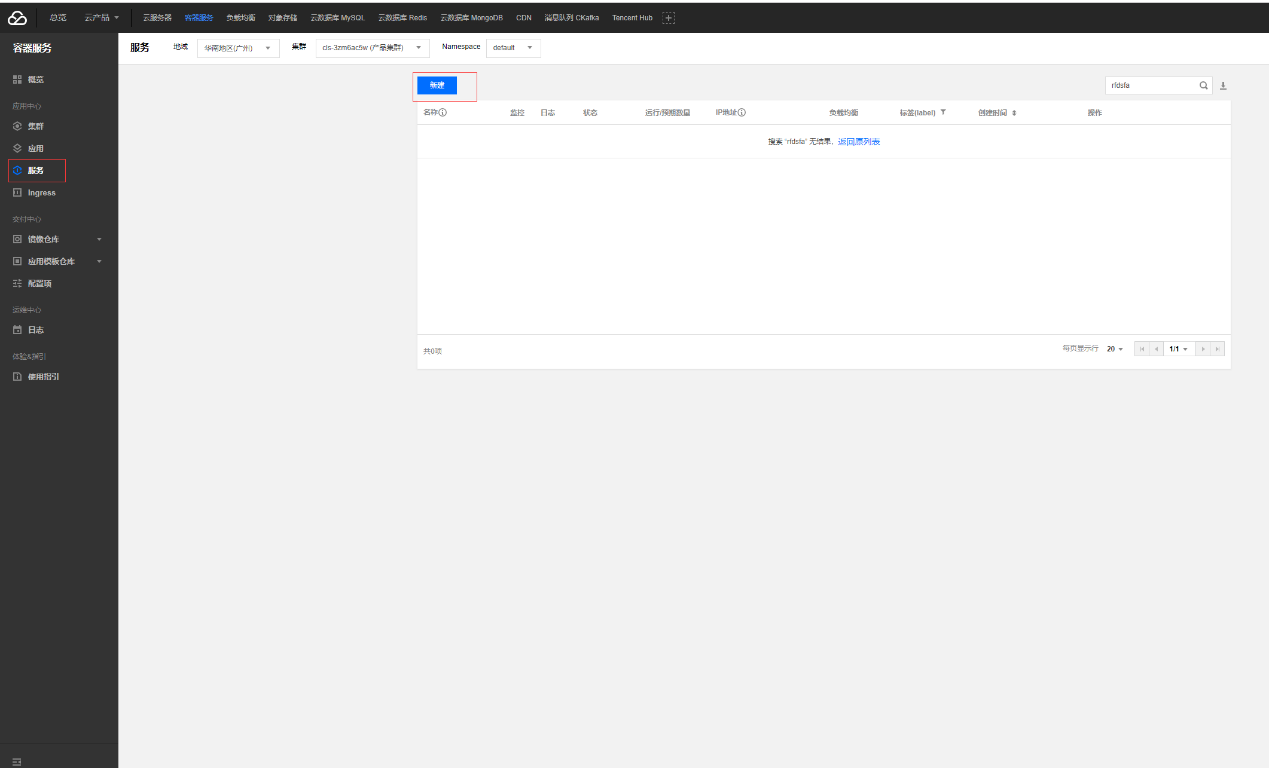
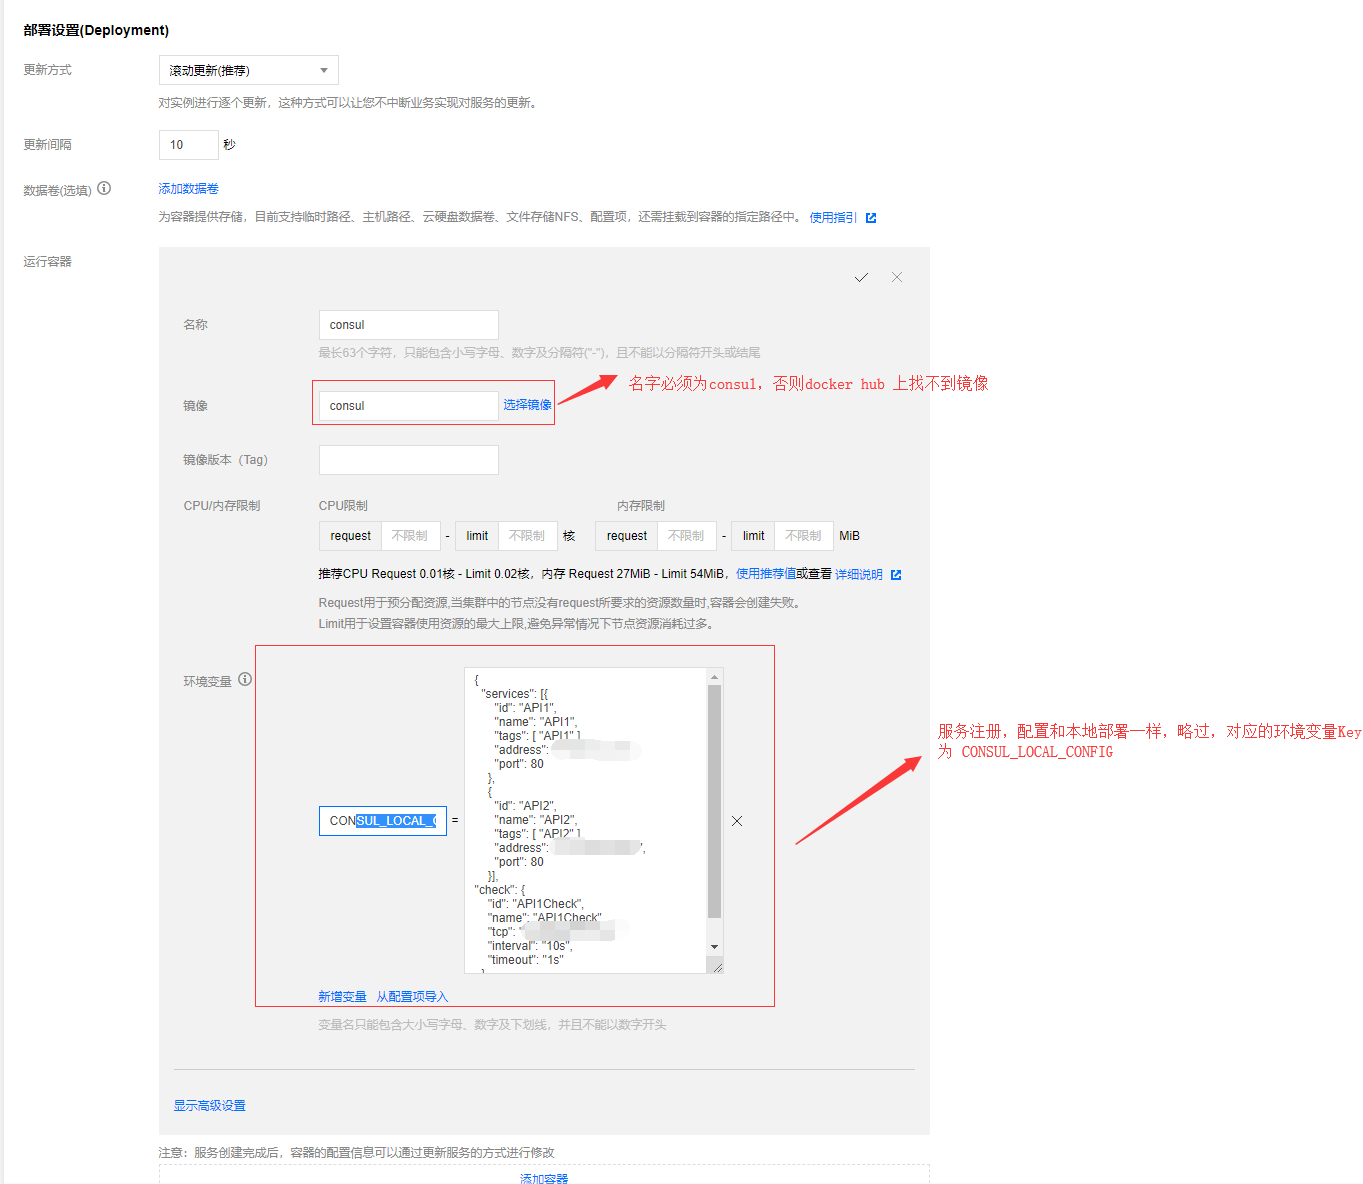
Set container port 8500 and service port 80 with Ingress routing.
Configuring Ocelot Gateway
Add .AddConsul() in Startup.cs:
services.AddOcelot(Configuration)
        .AddConsul()
        .AddCacheManager(x => { x.WithDictionaryHandle(); })
        .AddPolly()
        .AddAdministration("/administration", isaOpt);
Update ocelot.json with Consul service discovery provider in GlobalConfiguration:
"ServiceDiscoveryProvider": {
  "Host": "111.230.118.59",
  "Port": 80,
  "Type": "PollConsul",
  "PollingInterval": 1000
}
Ensure routes have ServiceName and UseServiceDiscovery: true.
Now Ocelot will discover service addresses via Consul. You can test by changing the service address in Consul to an invalid IP; requests through the gateway will fail.
Integrating Message Queue – CAP
CAP is a .NET Standard library for handling distributed transactions and event bus functionality. It guarantees message delivery even in failure scenarios.
GitHub: https://github.com/dotnetcore/CAP
Supported Message Queues: Kafka, RabbitMQ, AzureServiceBus Supported Databases: Sql Server, MySql, PostgreSQL, MongoDB
Environment Setup
Install RabbitMQ (requires Erlang). Download the latest versions from official sites.
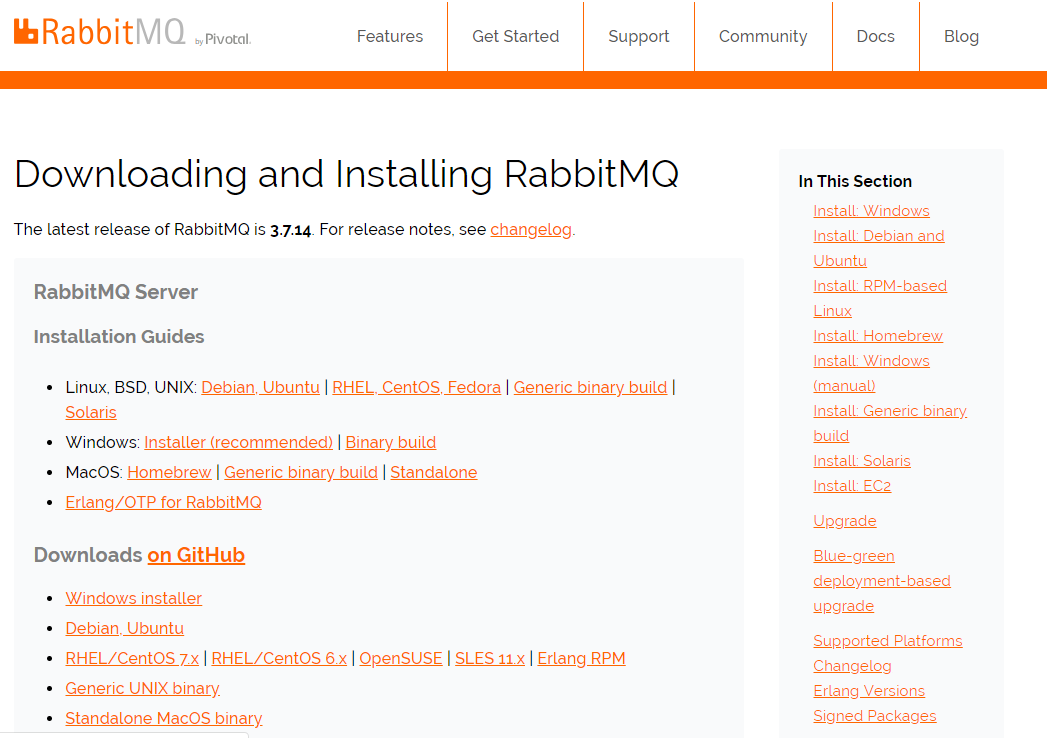
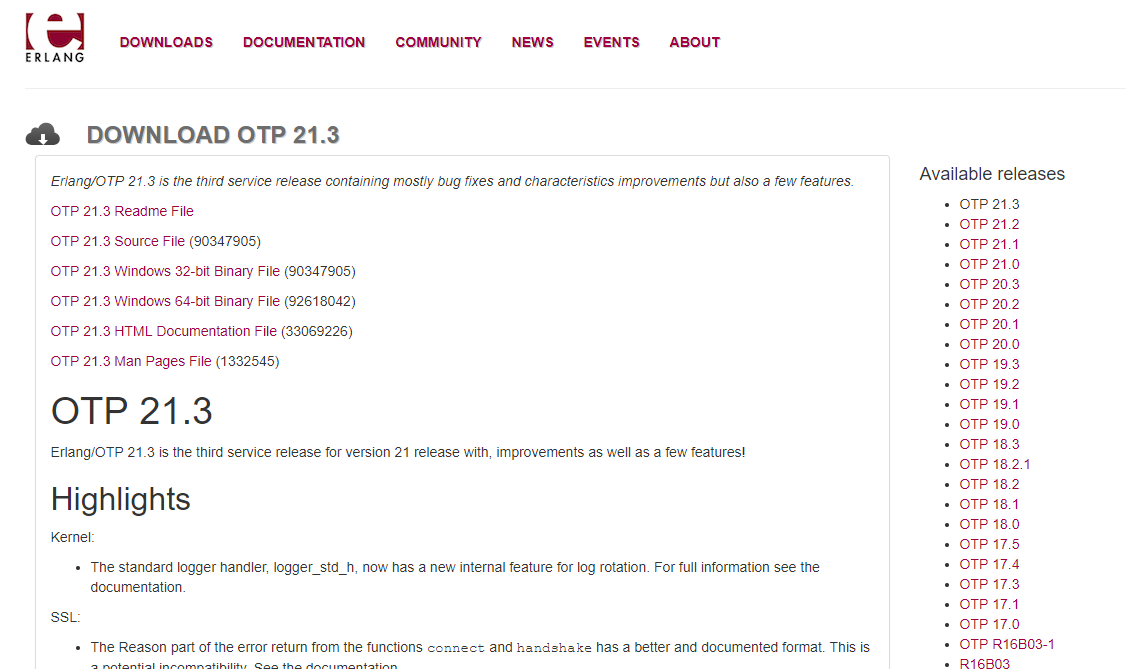
After installation, use the provided scripts (start, stop, etc.) or command line to start RabbitMQ.
Integrating CAP with .NET Core
Add NuGet packages to Service.Test1:
- DotNetCore.CAP
- DotNetCore.CAP.RabbitMQ
- DotNetCore.CAP.SqlServer
Add a Test entity and AppDbContext:
public class Test
{
    public int Id { get; set; }
    public string Name { get; set; }
    public string Title { get; set; }
}

public class AppDbContext : DbContext
{
    public AppDbContext(DbContextOptions<AppDbContext> options) : base(options) { }
    public DbSet<Test> Tests { get; set; }
}
Configure connection string:
"ConnectionStrings": {
  "Default": "Server=(localdb)\\MSSQLLocalDB; Database=Service_test1; Trusted_Connection=True;"
}
Update Program.cs to load configuration.
Configure CAP in Startup.ConfigureServices:
services.AddDbContext<AppDbContext>(options =>
    options.UseSqlServer(Configuration.GetConnectionString("Default")));

services.AddMvc().SetCompatibilityVersion(CompatibilityVersion.Version_2_2);

services.AddCap(options =>
{
    options.UseEntityFramework<AppDbContext>();
    options.UseSqlServer(Configuration.GetConnectionString("Default"));
    options.UseRabbitMQ("localhost");
    options.UseDashboard();

    if (Convert.ToBoolean(Configuration["Cap:UseConsul"]))
    {
        options.UseDiscovery(discovery =>
        {
            discovery.DiscoveryServerHostName = Configuration["Cap:DiscoveryServerHostName"];
            discovery.DiscoveryServerPort = Convert.ToInt32(Configuration["Cap:DiscoveryServerPort"]);
            discovery.CurrentNodeHostName = Configuration["Cap:CurrentNodeHostName"];
            discovery.CurrentNodePort = Convert.ToInt32(Configuration["Cap:CurrentNodePort"]);
            discovery.NodeId = Convert.ToInt32(Configuration["Cap:NodeId"]);
            discovery.NodeName = Configuration["Cap:NodeName"];
            discovery.MatchPath = Configuration["Cap:MatchPath"];
        });
    }
});
Alternatively, configure RabbitMQ options:
options.UseRabbitMQ(cfg =>
{
    cfg.HostName = Configuration["MQ:Host"];
    cfg.VirtualHost = Configuration["MQ:VirtualHost"];
    cfg.Port = Convert.ToInt32(Configuration["MQ:Port"]);
    cfg.UserName = Configuration["MQ:UserName"];
    cfg.Password = Configuration["MQ:Password"];
});
Add CAP configuration in appsettings.json:
"Cap": {
  "UseConsul": true,
  "CurrentNodeHostName": "localhost",
  "CurrentNodePort": 13001,
  "DiscoveryServerHostName": "127.0.0.1",
  "DiscoveryServerPort": 8500,
  "NodeId": 1,
  "NodeName": "CAP_API1",
  "MatchPath": "/api1/TestOnes"
}
Run migrations to create database tables.
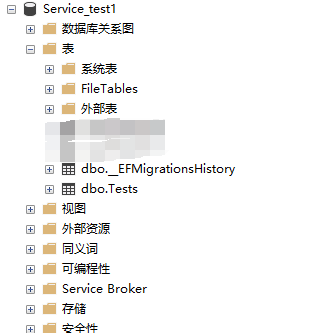
CAP Publishing
Modify TestOnesController to publish a message:
[Route("api1/[controller]")]
[ApiController]
public class TestOnesController : ControllerBase
{
    private readonly ICapPublisher _capBus;

    public TestOnesController(ICapPublisher capPublisher)
    {
        _capBus = capPublisher;
    }

    [HttpGet]
    public ActionResult<IEnumerable<string>> Get()
    {
        _capBus.Publish("services.test1.show.time", DateTime.Now);
        return new string[] { "TestOnes_value1", "TestOnes_value2" };
    }

    [HttpGet("health")]
    public ActionResult<string> Health()
    {
        return "Health OK";
    }
}
Start Consul, then the project. Access http://localhost:13001/cap to see the CAP Dashboard.
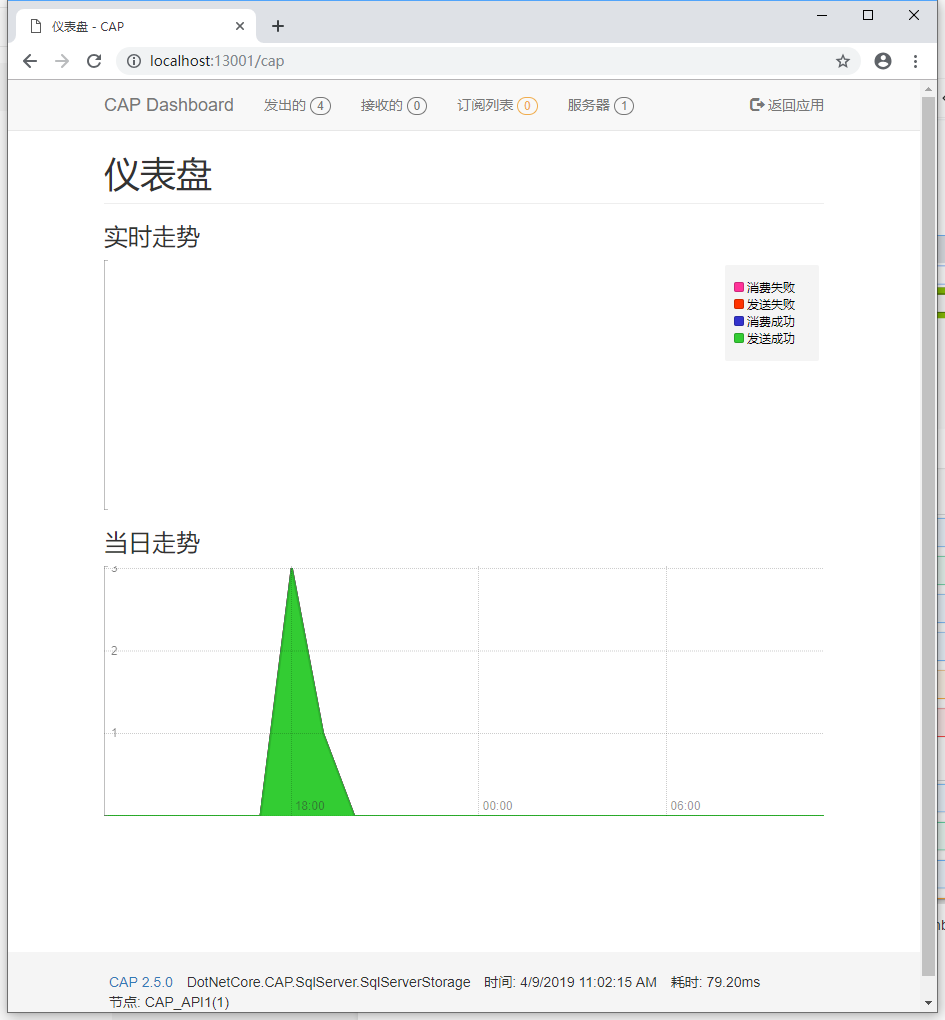
Hit the api1/TestOnes endpoint to publish a message. Database tables will contain the published messages.

CAP Dashboard shows statistics.
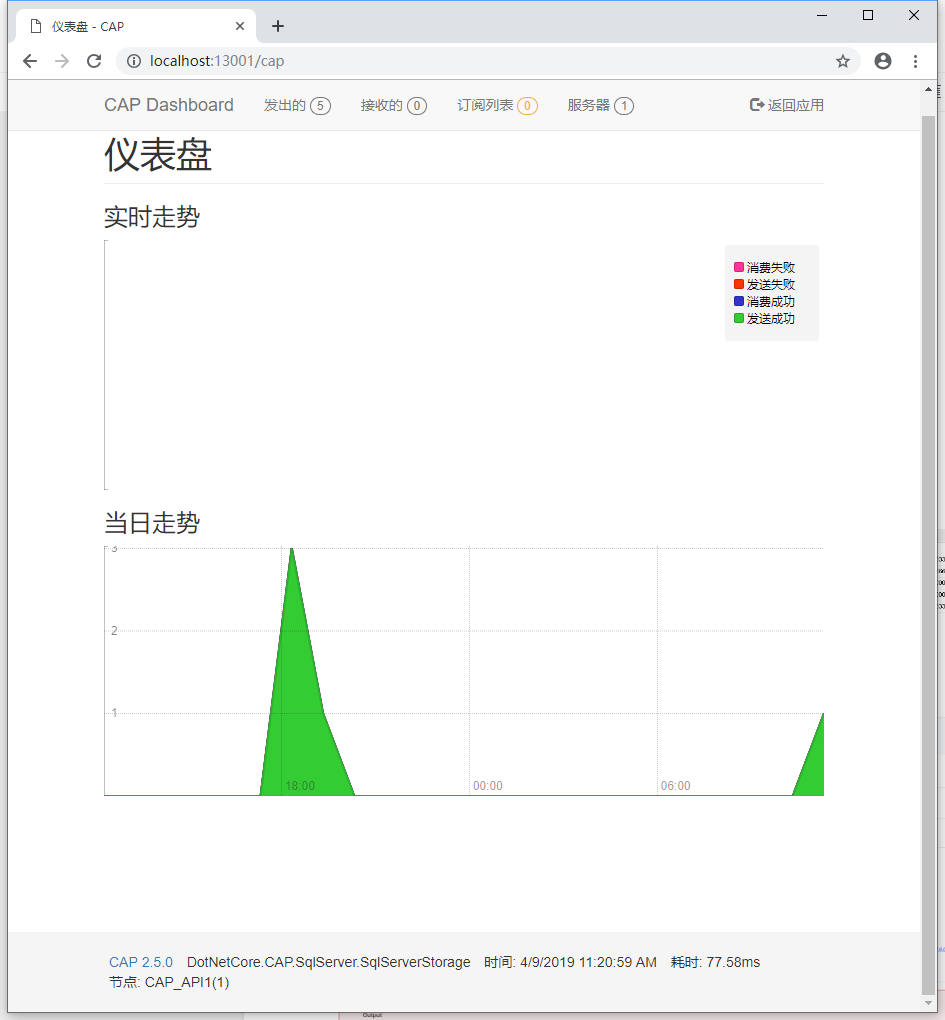
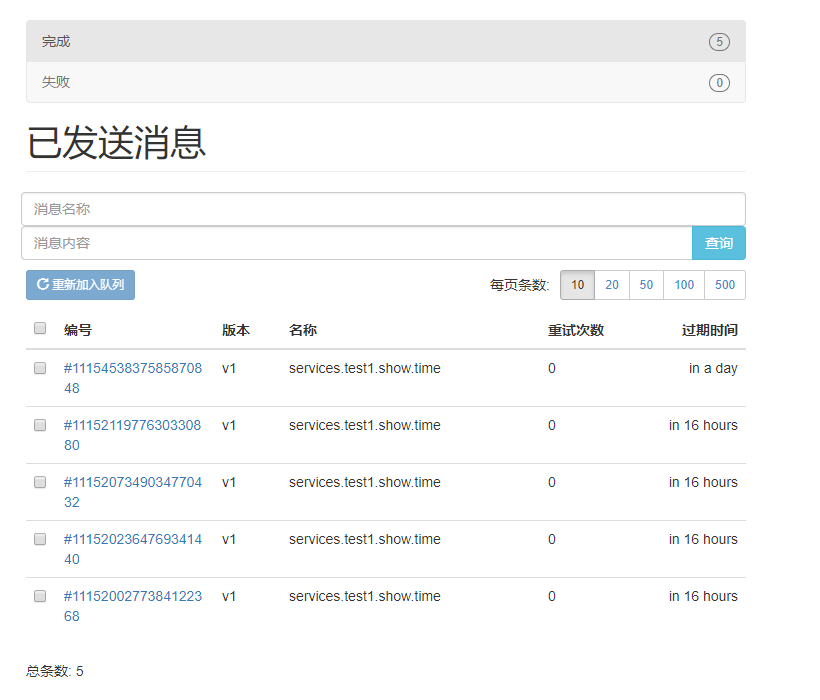
Consul UI shows the registered CAP_API1 service.
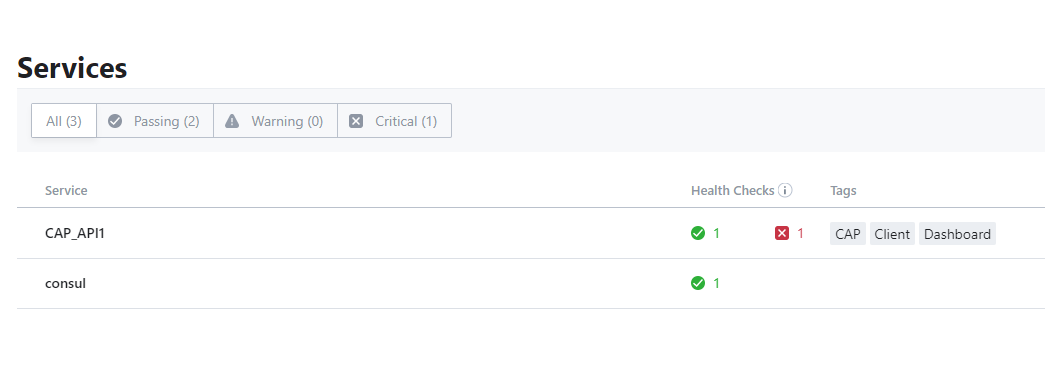
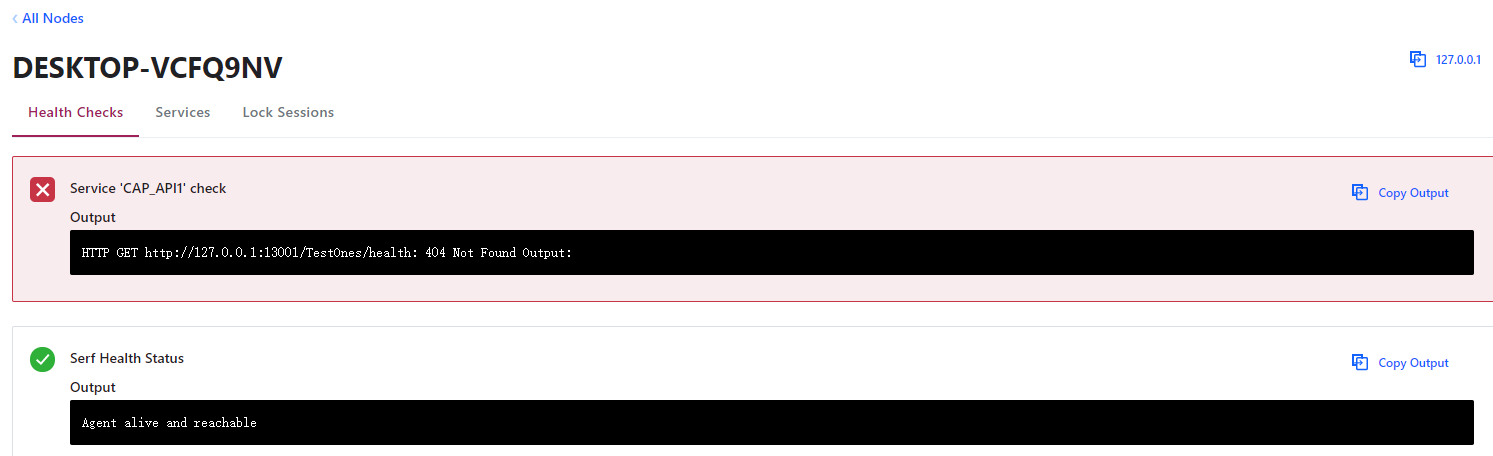
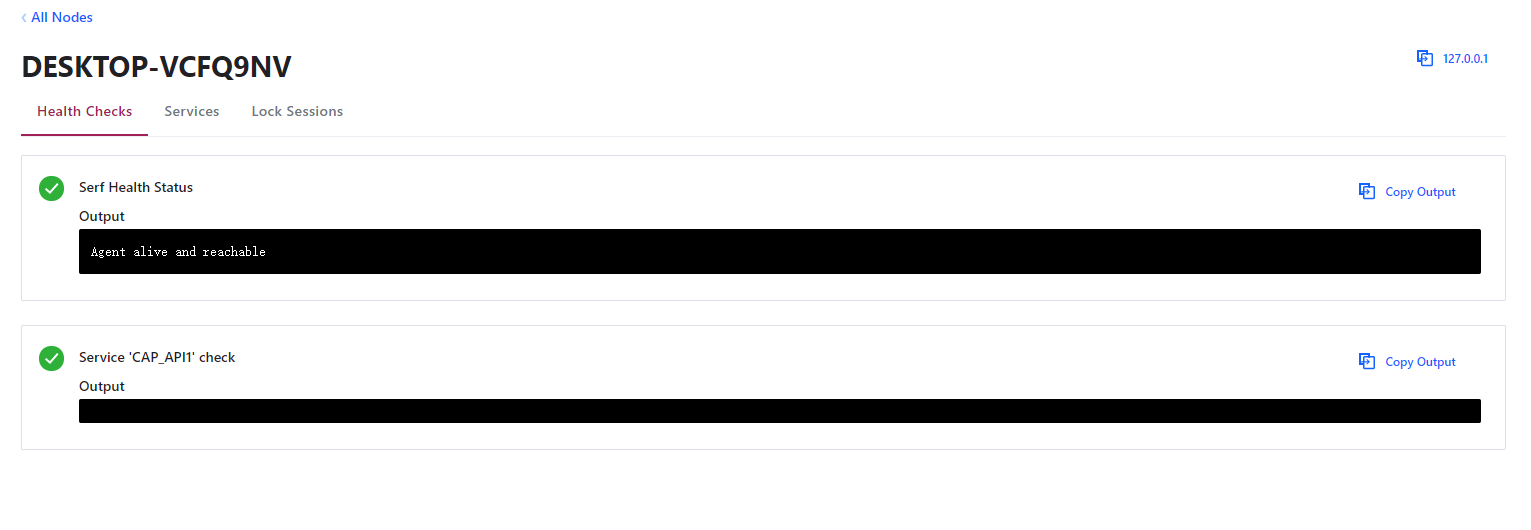
If MatchPath is misconfigured, health checks fail.
CAP Subscribing (Receiving)
Add a subscriber in the same or another project (with identical CAP configuration):
[Route("api1/[controller]")]
[ApiController]
public class ValuesController : ControllerBase
{
    [HttpGet("Received")]
    [CapSubscribe("services.test1.show.time")]
    public ActionResult<string> GetReceivedMessage(DateTime datetime)
    {
        Console.WriteLine($"Received: {datetime}");
        return $"Received: {datetime}";
    }
}
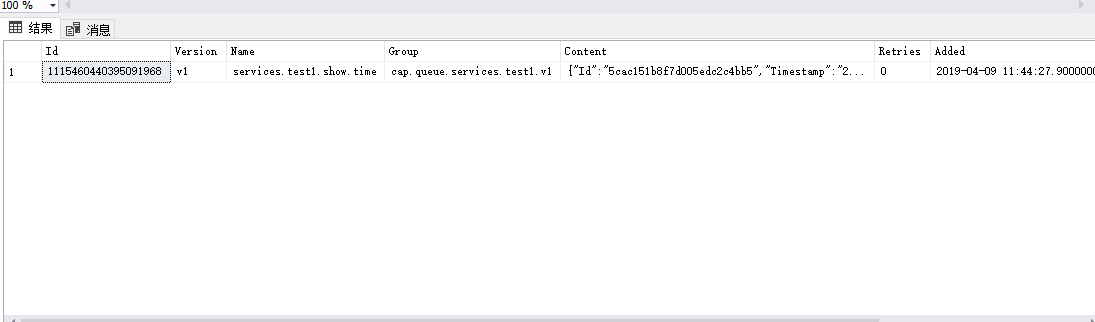
After publishing a message, the subscriber receives it. The database shows received messages, and the CAP Dashboard updates.
Final – Complete Source Code
The complete source code is available on GitHub: https://github.com/magicodes/Magicodes.Simple.Services