Hunyuan Module
We initially considered naming the project spring-ai-tencent, but to avoid potential confusion and keep the name clear, we settled on spring-ai-hunyuan. This name is simple, memorable, and avoids any ambiguity.
Code Extraction
The first step was to pull out all the Hunyuan integration code previously added to Spring AI. The resulting project structure is shown below:
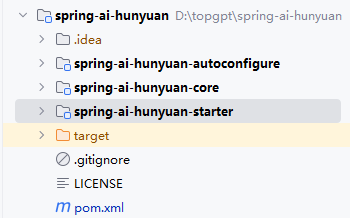
The core module handles the Hunyuan API integration, providing the fundamental interfaces and functionality. The autoconfigure module implements automatic dependency injection so that the necessary beans are assembled at runtime. The starter module is a convenience dependency that lets other projects quickly integrate Hunyuan support by simply adding a single artifact.
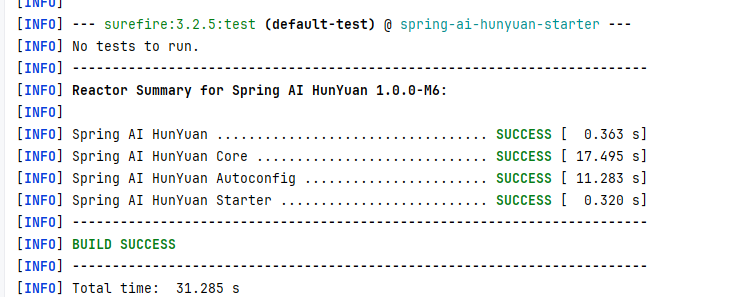
We ran the existing tests to verify everything still passes:
All package names were updated to io.github.studiousxiaoyu because Maven Central requires a namespace that follows certain conventions—simply choosing an arbitrary name is not allowed. This point will be explained in more detail later.
Registering a Maven Central Account
We registered an account on https://central.sonatype.com/. The step‑by‑step instructions on the site are clear, so they are not repeated here.
Namespace
Next, we created a namespace to host our open‑source code. For convenience, we used the GitHub repository address (a Gitee adress would also work). After adding the namespace, a unique verification token (displayed as a long string) was provided. This token must be placed in a public GitHub repository to prove ownership. We created an empty public repository, added the token, and then the namespace was successfully verified.
Credentials
Before publishing, the local Maven environment must be configured with two sets of credentials: a GPG key and a Maven Central account token. Both are mandatory for deployment.
GPG Key
First, install GnuPG from https://gnupg.org/download/index.html#sec-1-2. After installation, locate the bin directory (for example E:\Program Files (x86)\GnuPG\bin) and ensure it is accesible from the command line.
Generate a key pair:
gpg --gen-key
Once the key is created, distribute the public key:
gpg --keyserver keyserver.ubuntu.com --send-keys <generated-key-id>
Finally, add the passphrase to your Maven settings.xml. Note that the server ID gpg.passphrase is fixed and must not be changed:
<server>
    <id>gpg.passphrase</id>
    <passphrase>your-gpg-passphrase</passphrase>
</server>
If this entry is missing, the deploy phase will prompt for the passphrase interactively.
Maven Central Account Token
In the project’s pom.xml, we configure the Sonatype Central Publishing Plugin. The publishingServerId can be any identifier that matches a server entry in settings.xml. For example:
<build>
    <plugins>
        <plugin>
            <groupId>org.sonatype.central</groupId>
            <artifactId>central-publishing-maven-plugin</artifactId>
            <version>0.7.0</version>
            <extensions>true</extensions>
            <configuration>
                <publishingServerId>maven-central-release</publishingServerId>
            </configuration>
        </plugin>
    </plugins>
</build>
Then create a token from the account page at https://central.sonatype.com/account. Use the generated username and password in your settings.xml:
<settings>
  <servers>
    <server>
      <id>maven-central-release</id>
      <username><!-- your token username --></username>
      <password><!-- your token password --></password>
    </server>
  </servers>
</settings>
Here the id matches the publishingServerId value from the plugin configuration.
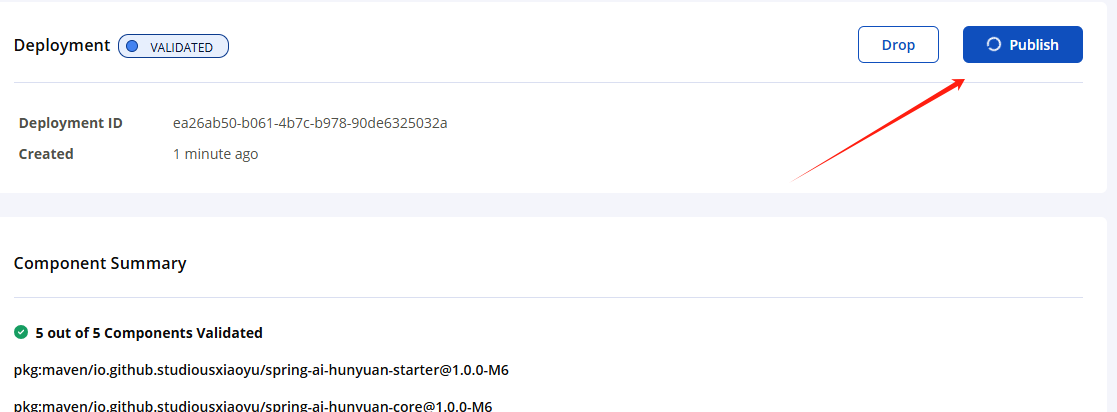
Publishing
With everything configured, execute:
mvn deploy
After a short while, the console will indicate a successful deployment. Head to https://central.sonatype.com/publishing/deployments to confirm the artifact was uploaded and published: