Installing Docker via Static Binary
Reference: Install Docker Engine from binaries
Download the static binary archive. Visit https://download.docker.com/linux/static/stable/ (or replace stable with nightly or test), select your hardware platform, and download the .tgz file corresponding to the Docker Engine version you wish to install.

In this guide, we download docker-19.03.5.tgz. Ensure you select the correct file for your hardware platform to avoid compatibility issues.
Upload and Extract
Upload the downloaded file to your server.

Extract the archive:
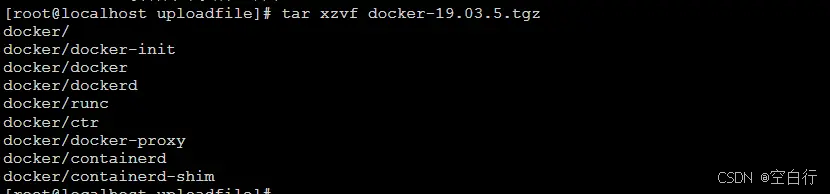
tar xzvf docker-19.03.5.tgz
Move Binaries and Create Systemd Service
Move the extracted binaries to a directory in your execution path, such as /usr/bin/:
sudo cp docker/* /usr/bin/
Create the systemd service file:
sudo vi /usr/lib/systemd/system/docker.service
Add the following content:
[Unit]
Description=Docker Application Container Engine
Documentation=https://docs.docker.com
After=network-online.target firewalld.service
Wants=network-online.target

[Service]
Type=notify
ExecStart=/usr/bin/dockerd
ExecReload=/bin/kill -s HUP $MAINPID
LimitNOFILE=infinity
LimitNPROC=infinity
TimeoutStartSec=0
Delegate=yes
KillMode=process
Restart=on-failure
StartLimitBurst=3
StartLimitInterval=60s

[Install]
WantedBy=multi-user.target
Start Docker Daemon
Reload systemd and start Docker:
sudo systemctl daemon-reload
sudo systemctl start docker.service
Verify Installation
Check Docker information:
sudo docker info
Example output:
Client:
 Debug Mode: false

Server:
 Containers: 0
  Running: 0
  Paused: 0
  Stopped: 0
 Images: 0
 Server Version: 19.03.5
 Storage Driver: overlay2
  Backing Filesystem: xfs
  Supports d_type: true
  Native Overlay Diff: true
 Logging Driver: json-file
 Cgroup Driver: cgroupfs
 Plugins:
  Volume: local
  Network: bridge host ipvlan macvlan null overlay
  Log: awslogs fluentd gcplogs gelf journald json-file local logentries splunk syslog
 Swarm: inactive
 Runtimes: runc
 Default Runtime: runc
 Init Binary: docker-init
 containerd version: b34a5c8af56e510852c35414db4c1f4fa6172339
 runc version: 3e425f80a8c931f88e6d94a8c831b9d5aa481657
 init version: fec3683
 Security Options:
  seccomp
   Profile: default
 Kernel Version: 3.10.0-957.el7.x86_64
 Operating System: Red Hat Enterprise Linux Server 7.6 (Maipo)
 OSType: linux
 Architecture: x86_64
 CPUs: 1
 Total Memory: 1.795GiB
 Name: localhost.localdomain
 ID: AV7D:WG7N:CATA:5SOR:IDCS:OPLA:QXVN:5Z3E:P6BH:5YHL:3IMT:FGLP
 Docker Root Dir: /var/lib/docker
 Debug Mode: false
 Registry: https://index.docker.io/v1/
 Labels:
 Experimental: false
 Insecure Registries:
  127.0.0.0/8
 Live Restore Enabled: false
 Product License: Community Engine
Enable Auto-start
Configure Docker to start automatically on boot:
sudo systemctl enable docker
Running Docker in an Offline Environment
If your server has no internet access, you can still use Docker by transferring pre-downloaded images from another machine.
Save Docker Image on an Online Machine
Assume you have pulled a MySQL 5.5 image:
sudo docker images
REPOSITORY          TAG                 IMAGE ID            CREATED             SIZE
mysql               5.5                 d404d78aa797        7 months ago        205MB
Save the image to a tar file:
sudo docker save d404d78aa797 > mysql5.tar
Verify the file:
ls
mysql5.tar
Transfer and Load Image on Offline Server
Copy the mysql5.tar file to the offline server (e.g., via USB or network transfer).
Load the image:
sudo docker load < mysql5.tar
Example output:
6270adb5794c: Loading layer [==================================================>]  58.45MB/58.45MB
432b5f62e513: Loading layer [==================================================>]  338.4kB/338.4kB
...
Loaded image ID: sha256:d404d78aa797c87c255e5ae2beb5d8d0e4d095f930b1f20dc208eaa957477b74
Check the imported image:
sudo docker images
REPOSITORY          TAG                 IMAGE ID            CREATED             SIZE
<none>              <none>              d404d78aa797        7 months ago        205MB
Tag the Image
Assign a meaningful name and tag:
sudo docker tag d404d78aa797 mysql:5.5
sudo docker images
REPOSITORY          TAG                 IMAGE ID            CREATED             SIZE
mysql               5.5                 d404d78aa797        7 months ago        205MB
Run the Conatiner
Start a container from the image:
sudo docker run -itd --name mysql-test -p 3306:3306 -e MYSQL_ROOT_PASSWORD=123456 mysql:5.5
sudo docker ps
CONTAINER ID        IMAGE               COMMAND                  CREATED             STATUS              PORTS                    NAMES
8cd5768993ea        mysql:5.5           "docker-entrypoint.s…"   5 minutes ago       Up 5 minutes        0.0.0.0:3306->3306/tcp   mysql-test
Access the Container
Execute a shell inside the container and log into MySQL:
sudo docker exec -it 8cd5768993ea /bin/bash
root@8cd5768993ea:/# mysql -u root -p
Enter password:
Welcome to the MySQL monitor.  Commands end with ; or \g.
...
mysql>
Summary
In a network-restricted environment, you can install Docker from static binaries, trensfer pre-saved images, load them, and run containers. Note the difference between docker save (which preserves image layers and metadata) and docker export (which exports a container's filesystem as a tar archive). Use save for preserving images complete with history, and export for a flat filesystem snapshot.
This guide was adapted from an article about installing Docker in an offline environment.